As a Prodigy Commerce store owner, your primary activity involves managing orders, with tasks like checking orders for fraud, accepting payments, and fulfilling items for shipment. Prodigy offers an efficient and user-friendly order management workflow to ensure you can fulfill orders in a timely manner, oversee the entire order process, and feel comfortable in the dashboard at all times. In this article, we’ll explain how to manage orders with ease in Prodigy Commerce. Keep reading to see how it’s done!
How to Manage Orders in Prodigy Commerce
When compared with other WordPress eCommerce solutions like WooCommerce, order management on Prodigy’s eCommerce platform takes place in one area of the dashboard, and each part of the process only requires a quick action.
The vast majority of features for order management are consolidated into the Orders tab on Prodigy.
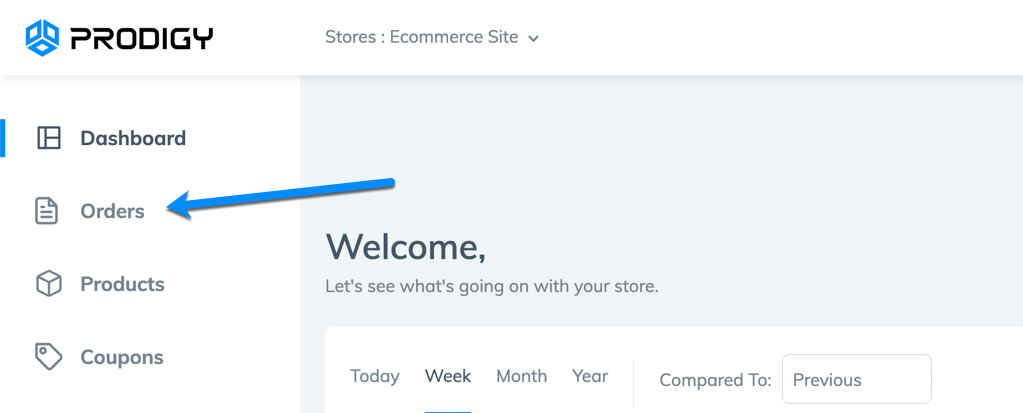
Once you locate the Orders tab, you can follow along with the simple order management steps below.
How to View Orders in Prodigy
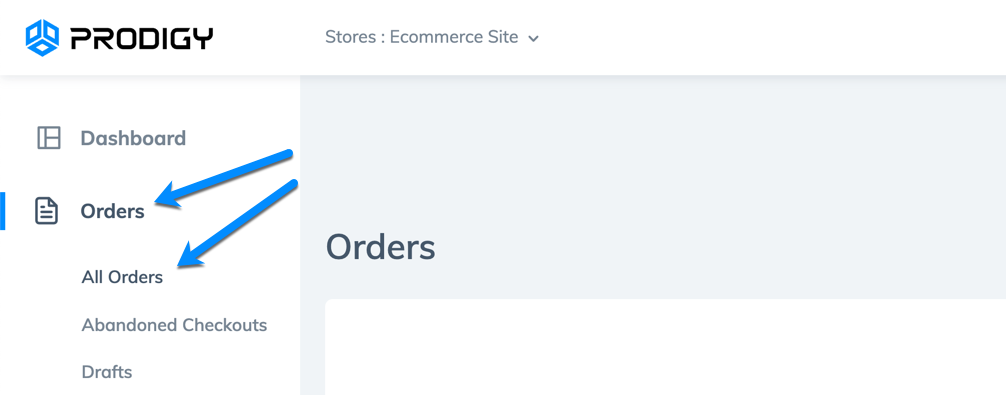
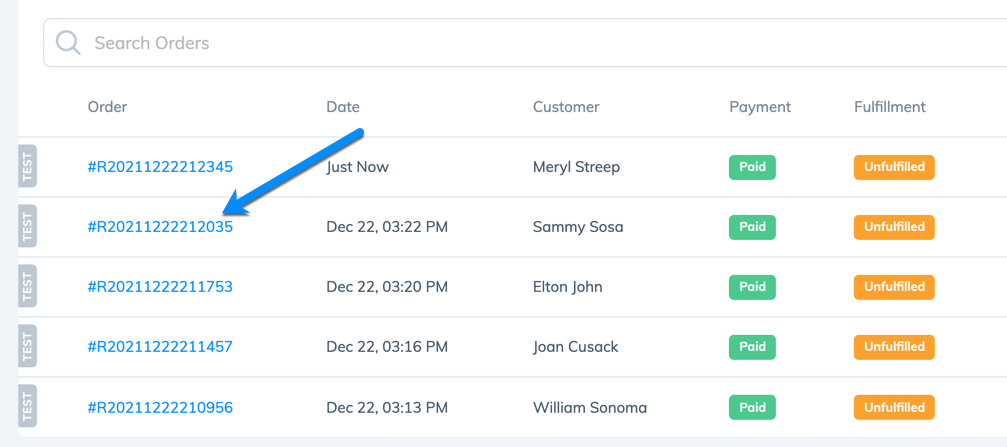
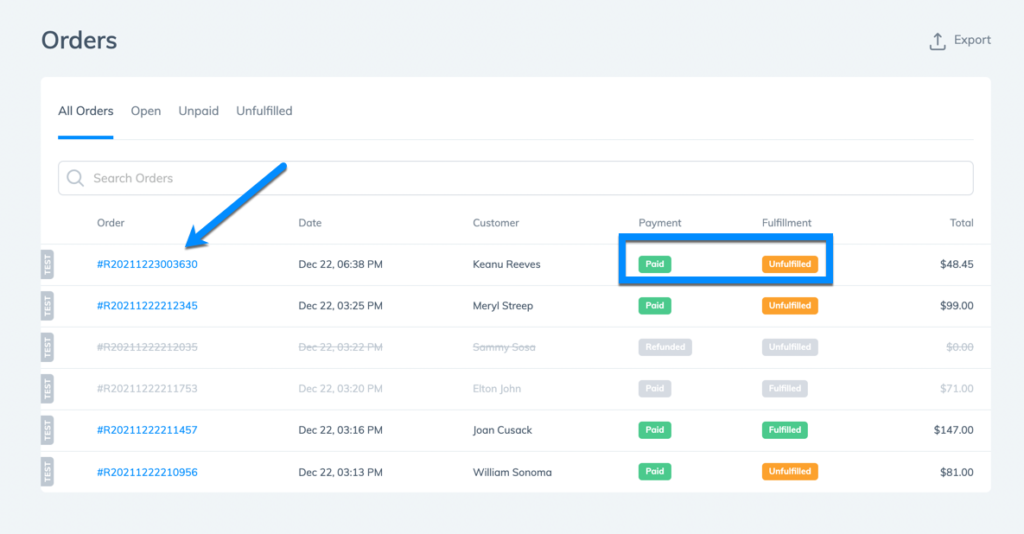
For a store owner to view all recent orders (and complete most order management tasks), click on the Orders tab. The All Orders option also brings you to the same place.
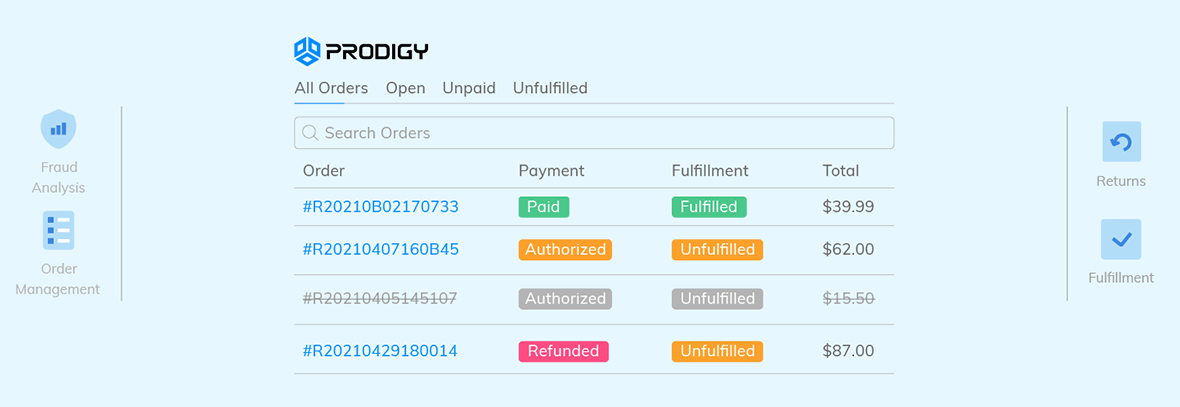
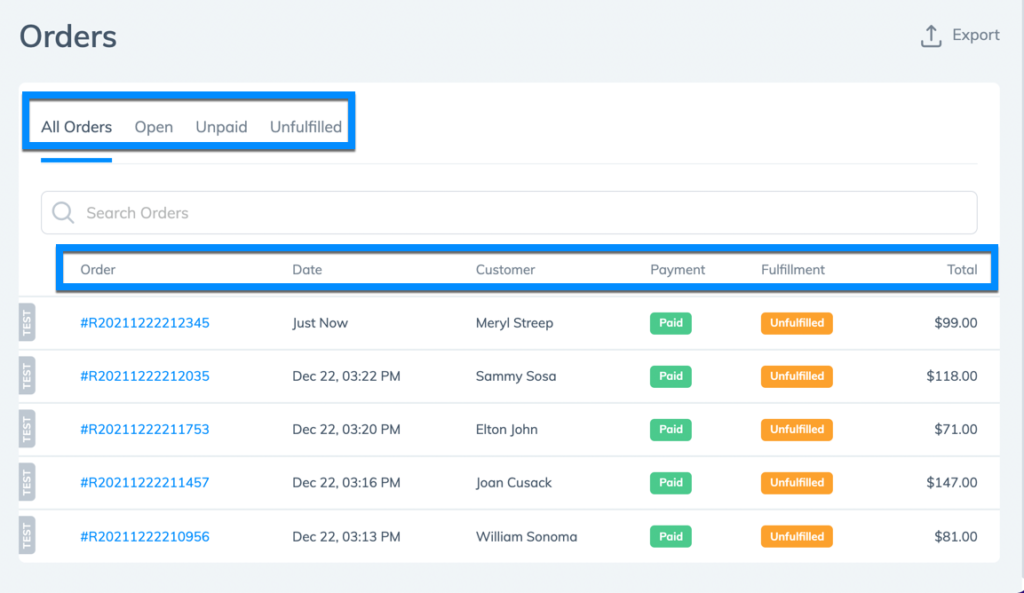
The Orders page presents a list of all recent and past orders. You can filter based on order status and order details like:
- Order #
- Date
- Customer
- Payment
- Fulfillment
- Total
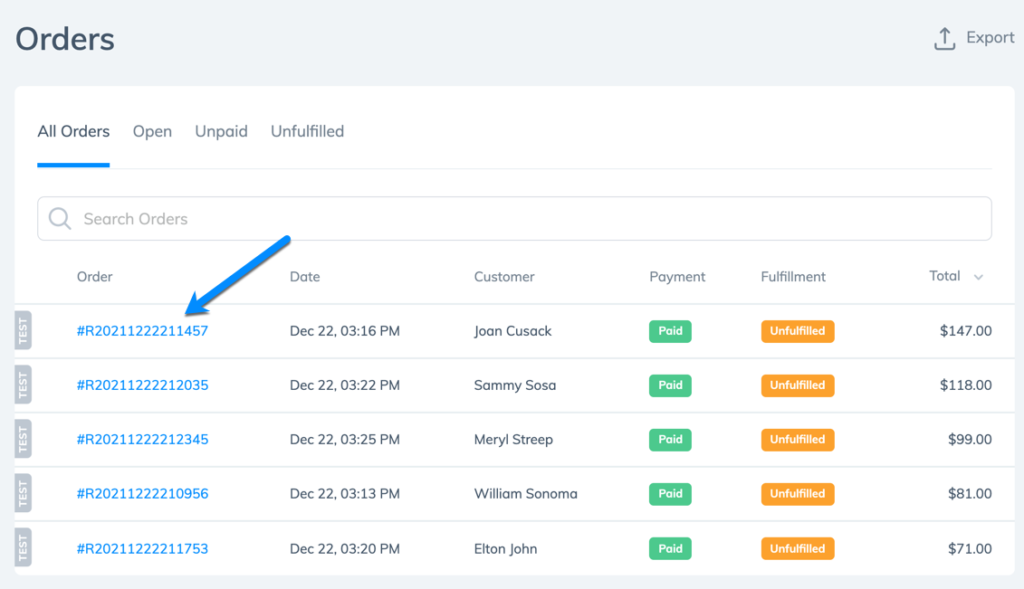
To view an individual order, click on the Order # link for that order only.
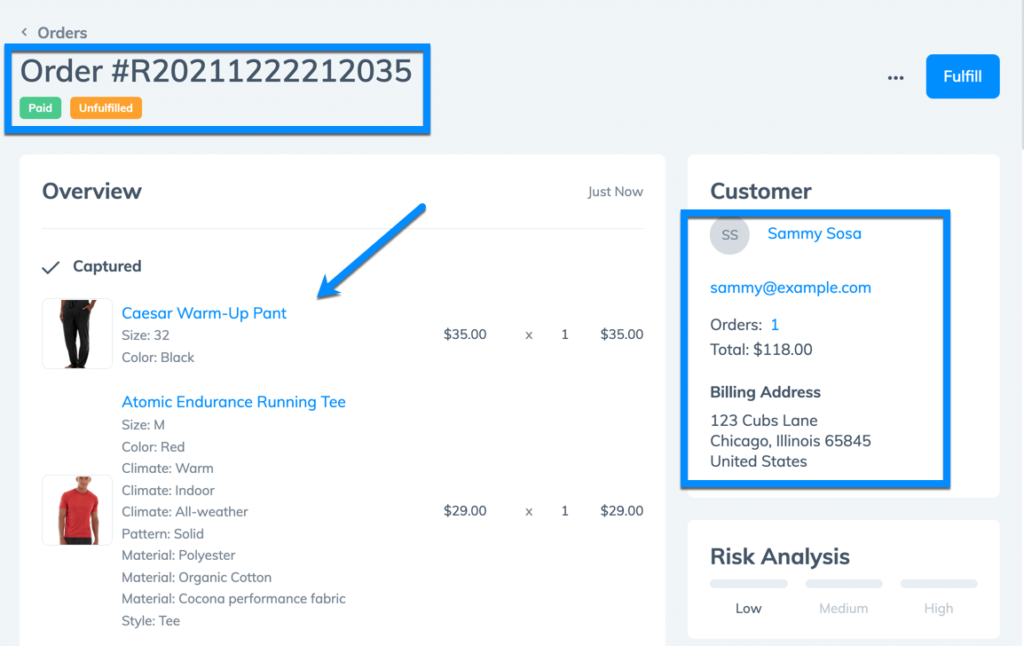
Each Order page provides extensive information including:
- The Order #
- Payment status
- Fulfillment status
- Products purchased
- Customer name, email, and billing address
- Risk level
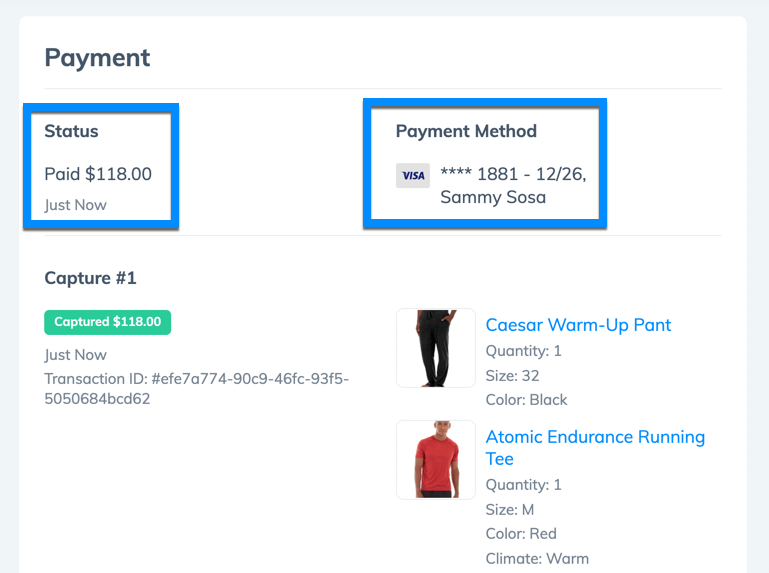
Scroll down further on the order page to view more specific information about the order status and payment method, along with whether you captured a payment.
Read how to set up eCommerce payments in Prodigy if you need help.
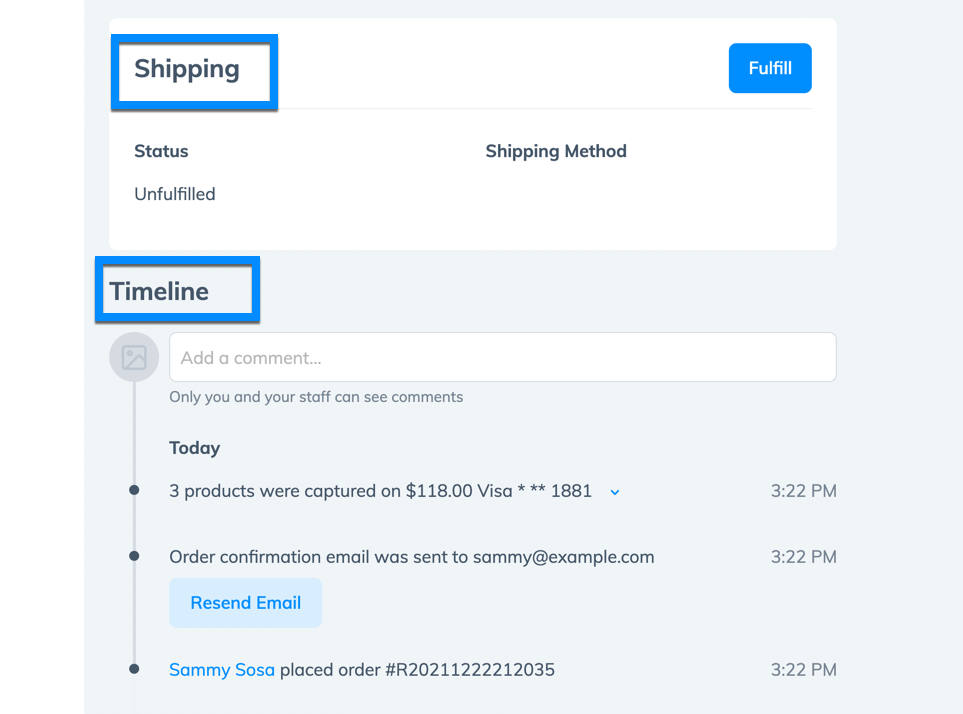
You can also find Shipping and Order Timeline sections at the bottom of the Order page.
Search, Sort, and Filter Orders for Easier Viewing
Prodigy makes finding orders simple with several search, sort, and filter tools. That way, you don’t have to scroll through a long list to locate one order out of hundreds or thousands.
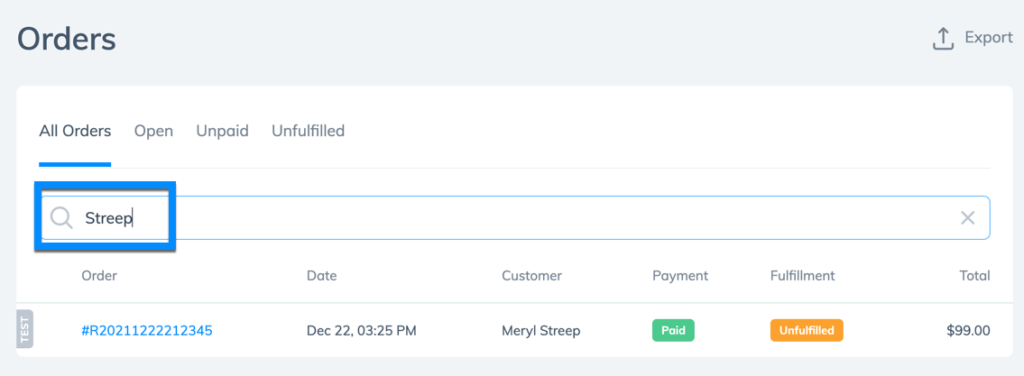
To search for an order based on keywords, select the Search Bar above your order list. Type something in, like a customer name, order number, or product details to only reveal the orders with those keywords.
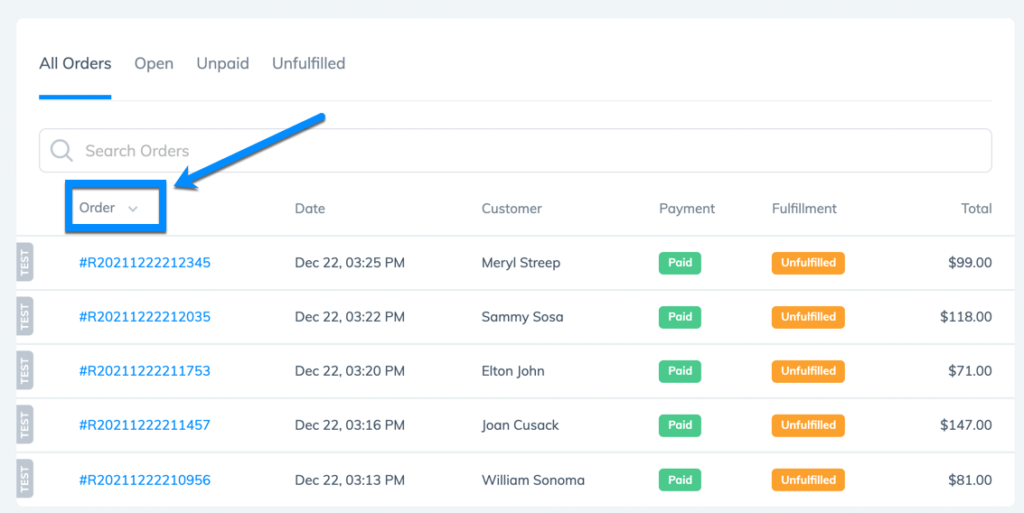
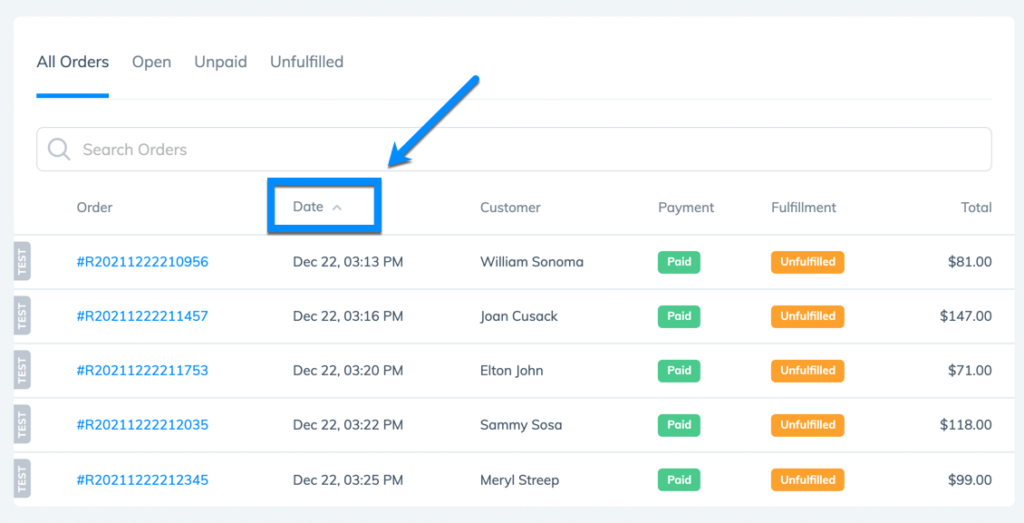
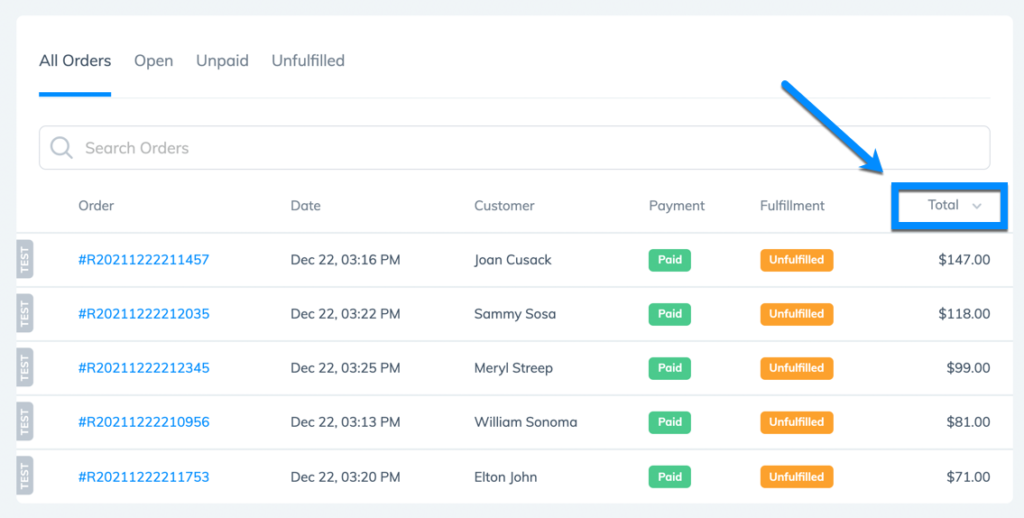
You can sort order lists in Prodigy by Order Number, Date, or Total. Click any of these columns to switch between ascending or descending order.
Sort by Date to view the most recent, or the oldest, orders at the top of the screen.
Sort by Total to bring the highest order totals to the top or send them to the bottom.
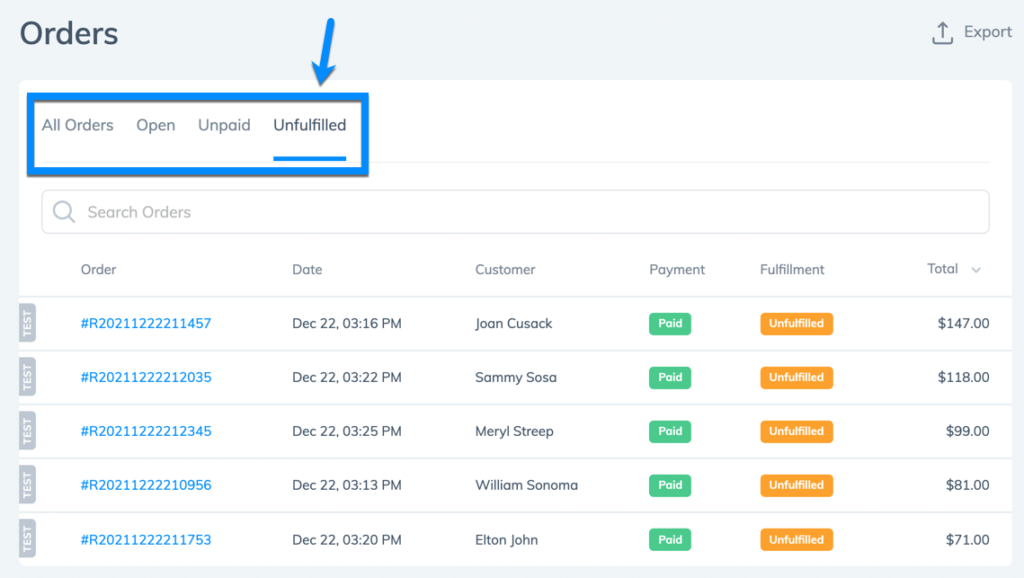
Filtering in Prodigy happens in the same area, where you can click on a filter to reveal:
- All Orders
- Open Orders
- Unpaid Orders
- Unfulfilled Orders
How to Fulfill Orders in Prodigy
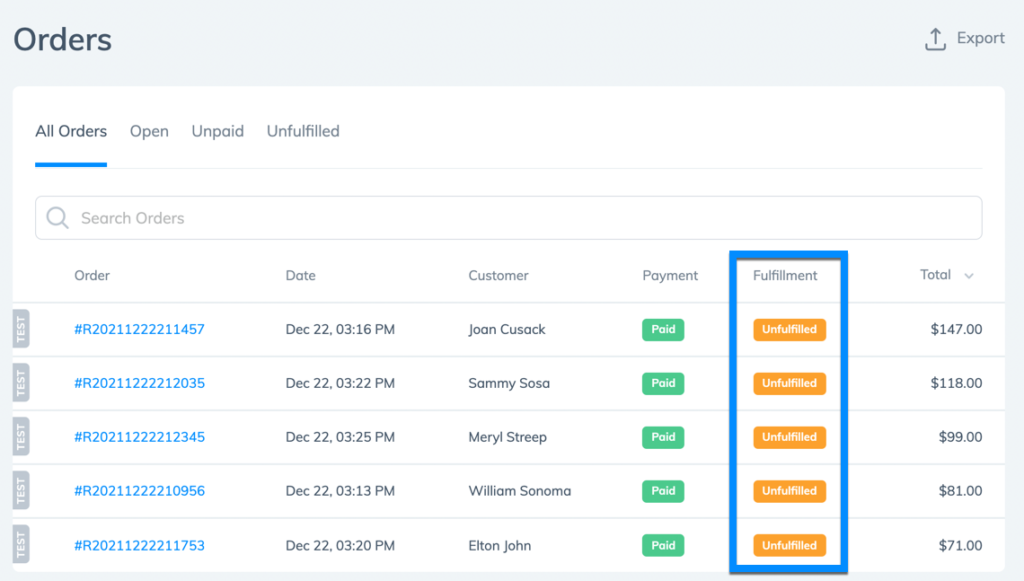
Prodigy store owners can fulfill orders by going to Orders > All Orders on the dashboard.
Locate orders marked with the orange Unfulfilled tag (by filtering or sorting).
Click on the Order Number link to fulfill one of those orders.
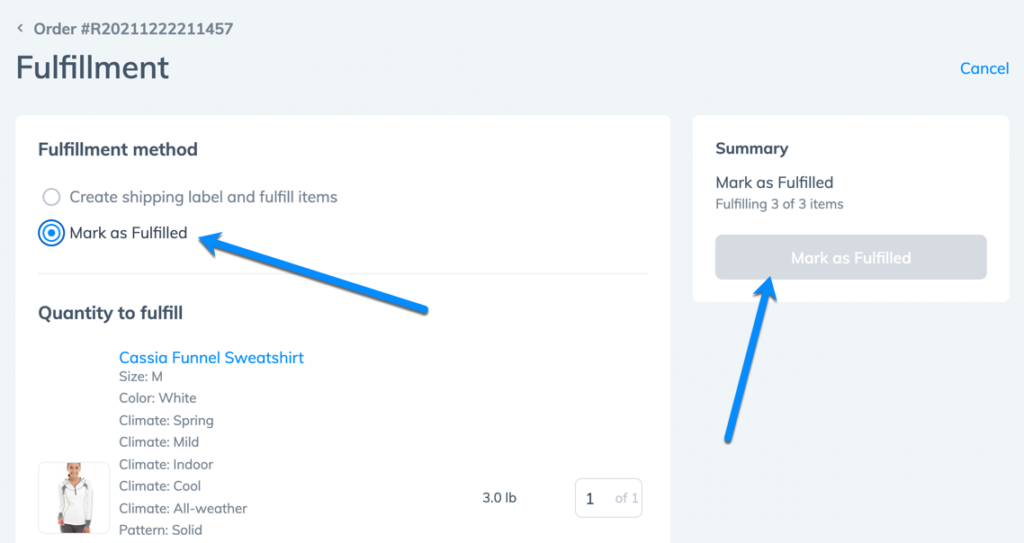
Click on the Fulfill button on the right side.
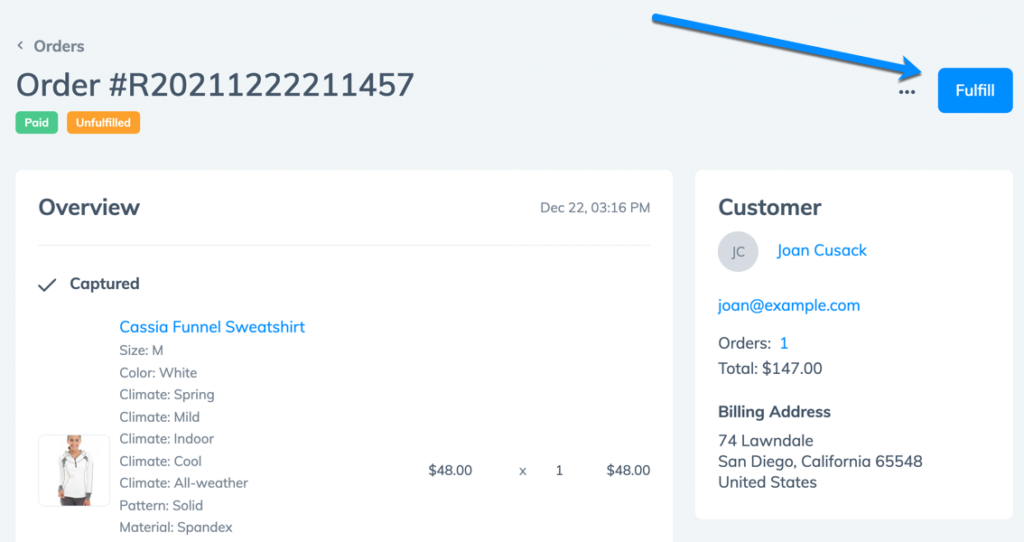
Store owners have two options for fulfillment:
- Create shipping label and fulfill items
- Mark as fulfilled
Use the Mark as Fulfilled option if you don’t want to create a shipping label. You’ll see that the Mark As Fulfilled button is still greyed out. That’s because you must choose a carrier below.
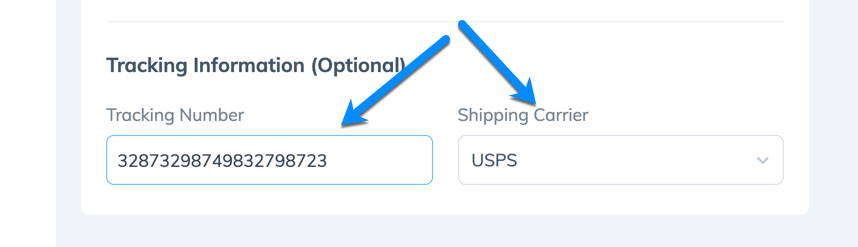
Scroll down on the Order page to paste in an optional tracking number. Use the Shipping Carrier dropdown to select a carrier like USPS, FedEx, UPS, or DHL.
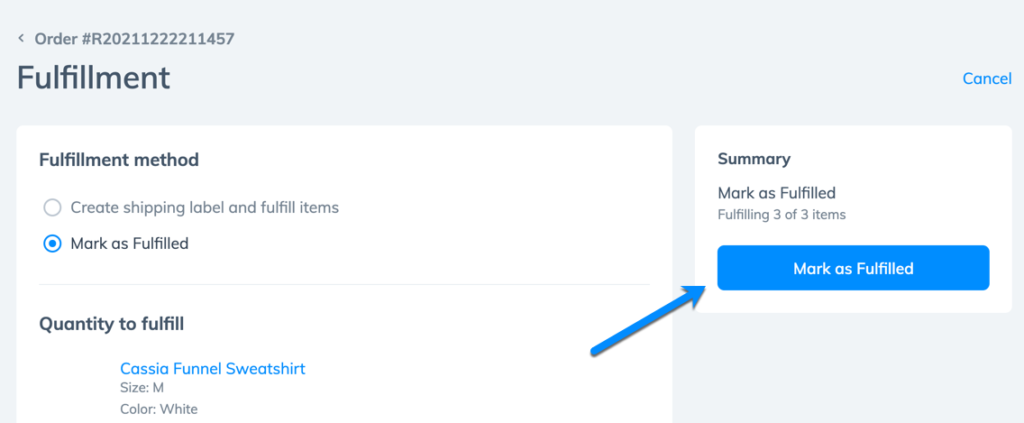
With a carrier selected, you can now click on the Mark As Fulfilled button.
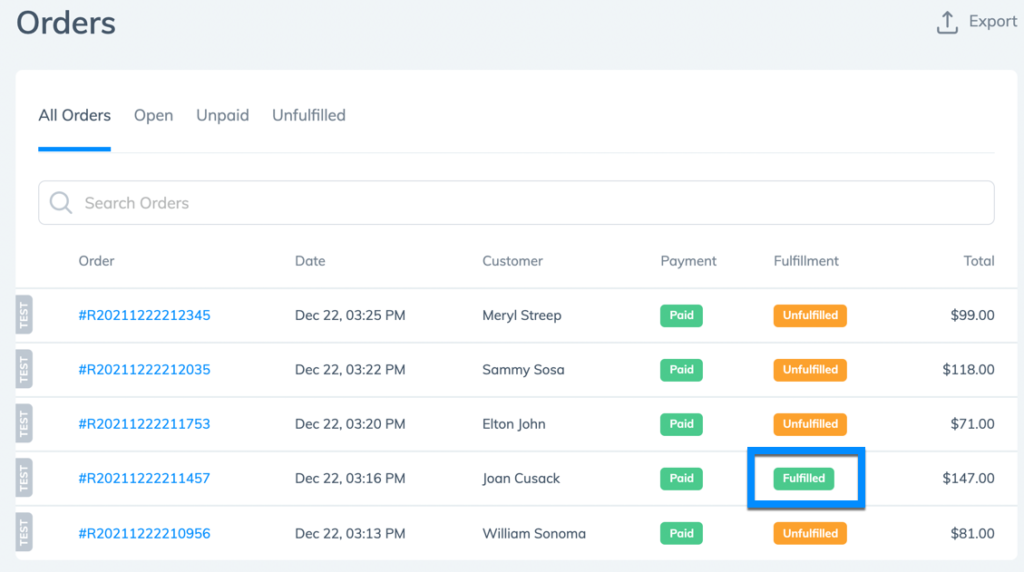
The result is the order showing a green Fulfilled tag on the Orders list.
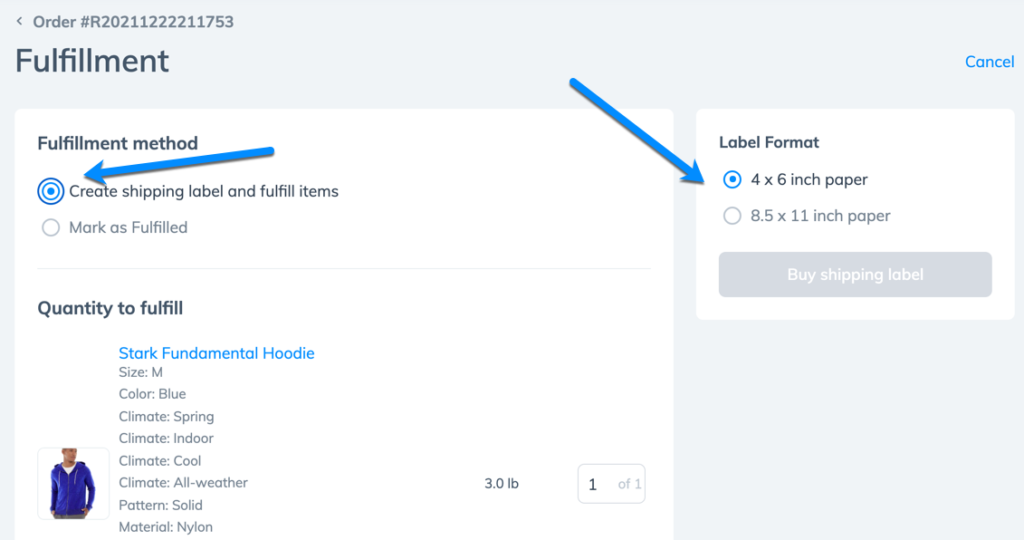
The other option is to create a Shipping Label and Fulfill Items. Mark that to proceed.
Again, you’ll notice the final Buy Shipping Label button is greyed out.
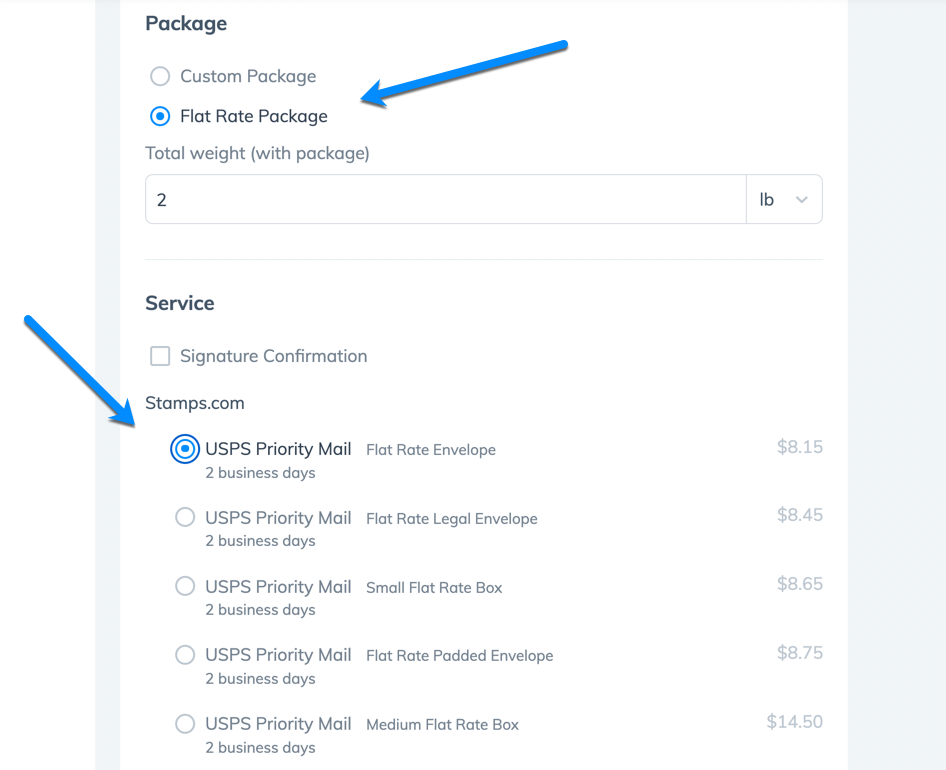
To resolve that, go to the bottom of the Order page. Choose a Custom or Flat Rate Package. Also, specify the Total Weight.
In Prodigy, the Flat Rate Package option reveals real-time rates from USPS. Choose which shipping method and rate you want. Also consider opting for a signature confirmation if necessary.
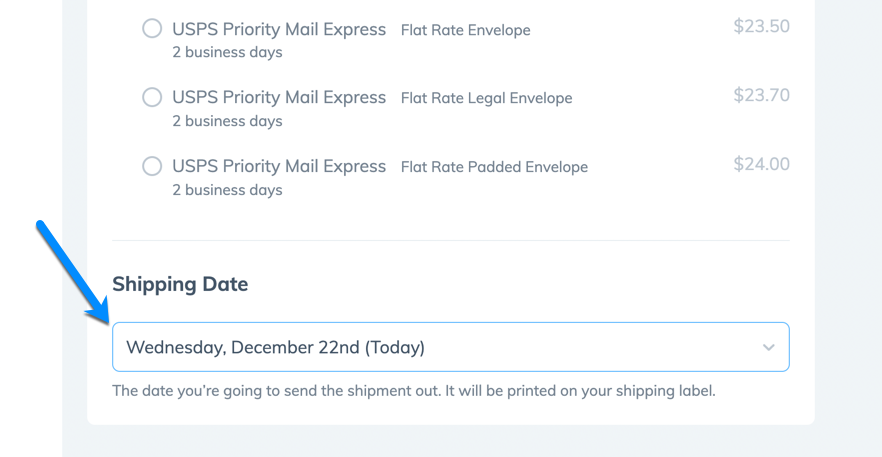
You must also set a date on which you plan to ship the package. Use the Shipping Date dropdown to select Today, or another day in the future.
With all that information completed, Prodigy now lets you click on the Buy Shipping Label button. Mark which Label Format you desire and click the button.

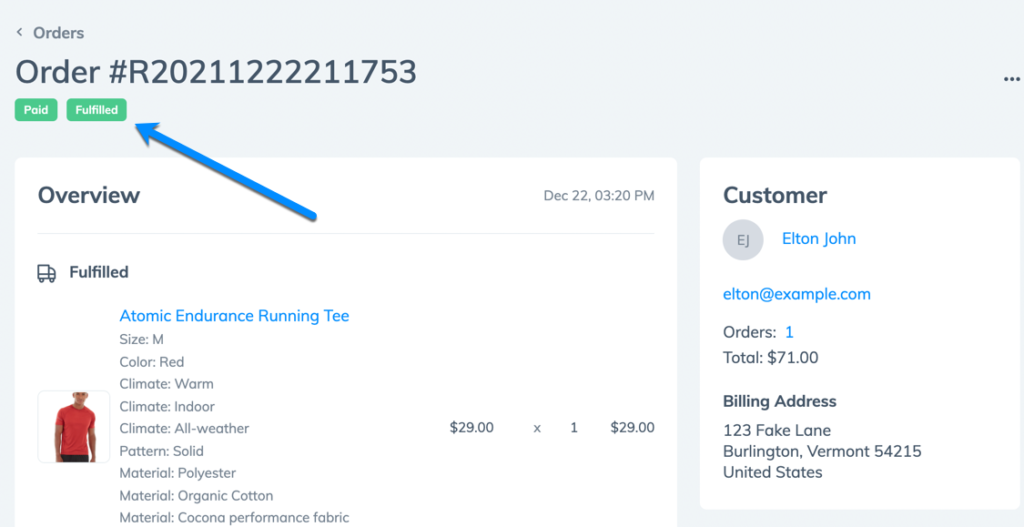
The order shows as Fulfilled.
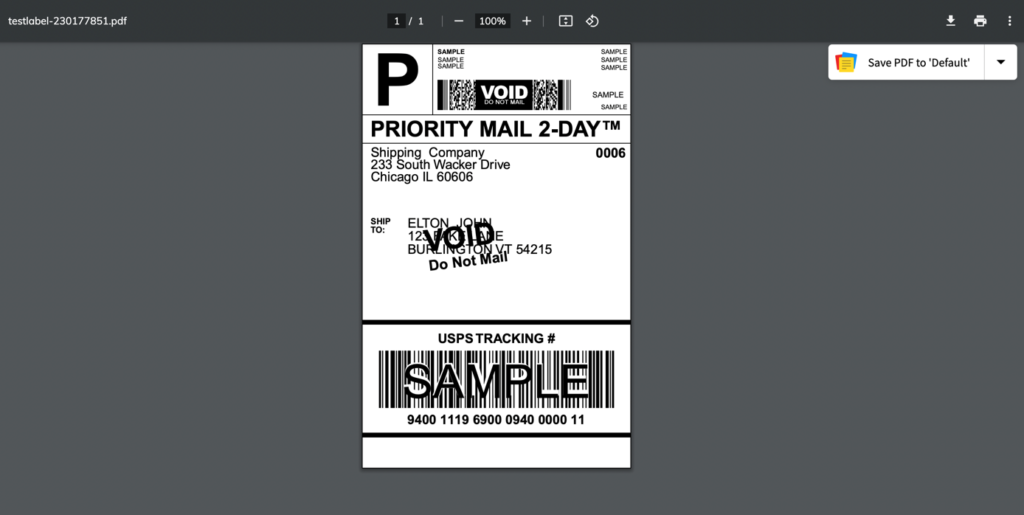
To print the shipping label, go down to the Shipping section on this Order page. Find and click the Print Label button.
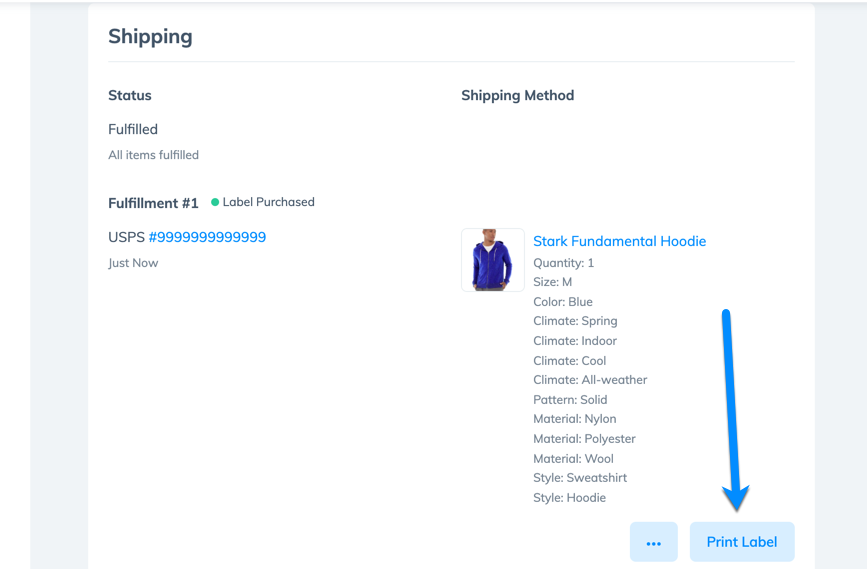
Prodigy auto-generates a USPS mailing label in PDF format for you to put on the package.
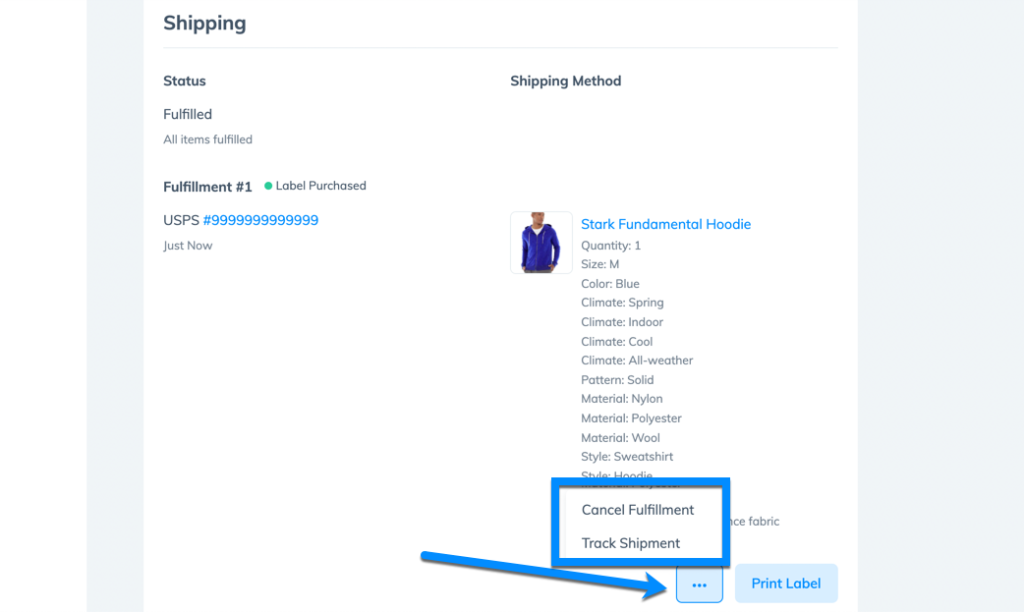
There’s also a “…” ellipsis button next to the Print Label option to either Cancel Fulfillment or Track Shipment.
How to Manage Payments for Orders
As payments come in through your Prodigy store, they’re automatically authorized and store owners can either set payments to be captured automatically or they can capture them manually.
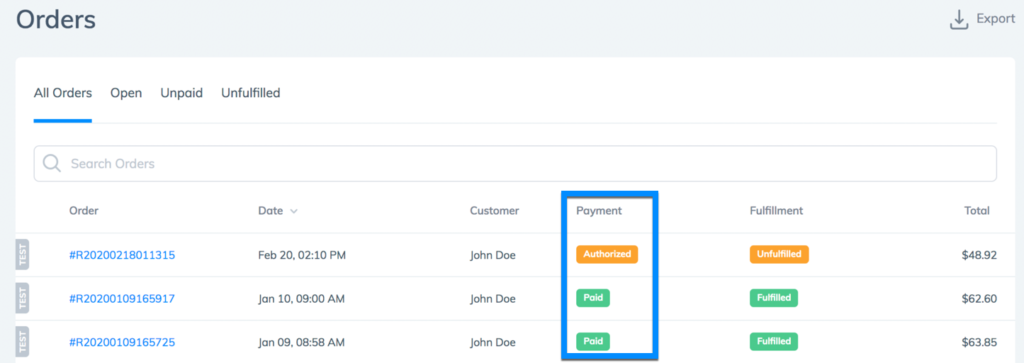
Start by going to the Orders page. Prodigy lists the payment status of each order under the Payment column.
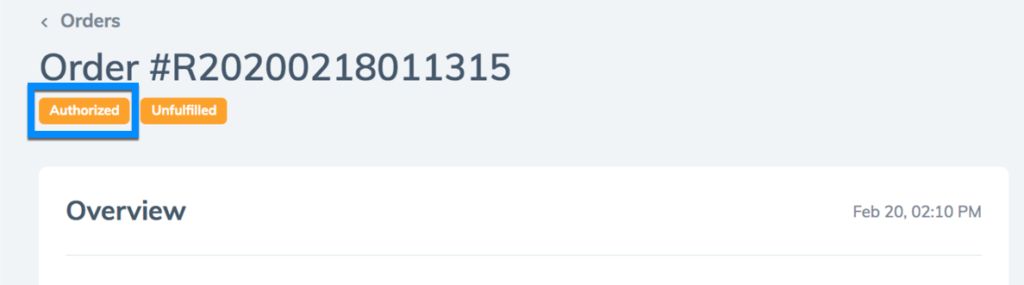
Click on an order labeled Authorized to complete the process of manually capturing the payment.
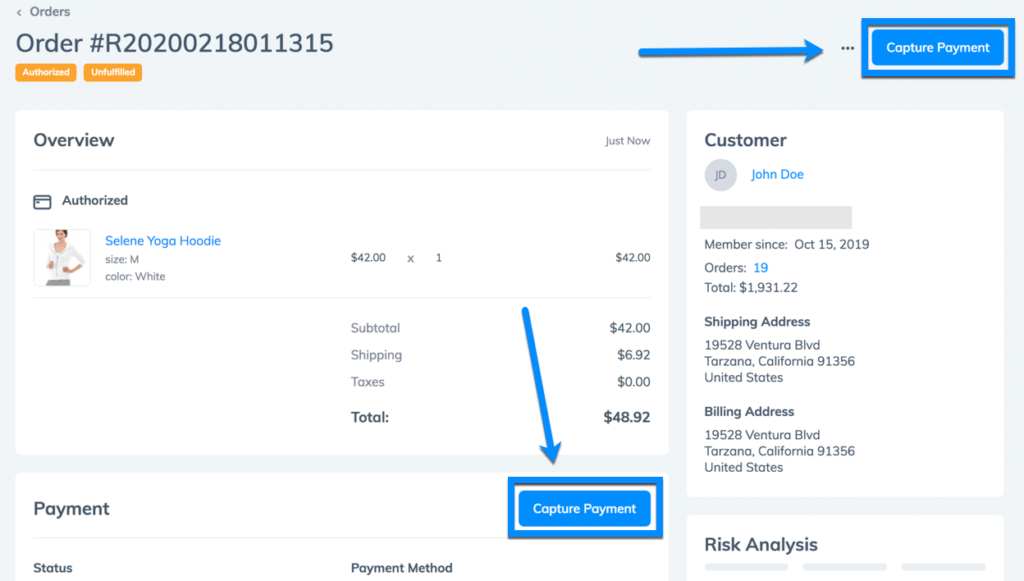
The payment status also appears within the Order page.
Accept an order’s payment by clicking on one of the Capture Payment buttons.
Finish the process with the Accept button.

Configuring Payment Capture Settings
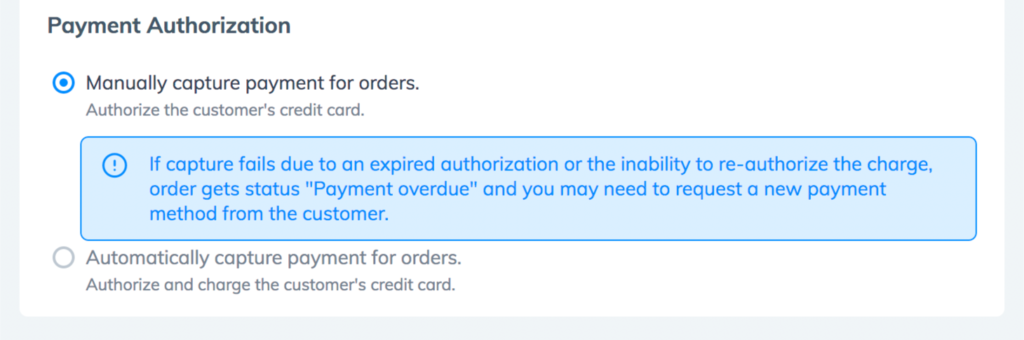
Store owners have two options for capturing payments in Prodigy:
- Manually Capture Payment for Orders
- Automatically Capture Payment for Orders
You can configure these settings by going to Settings > Payments in the Prodigy dashboard.
How Do You Manage a Failed Payment Capture?
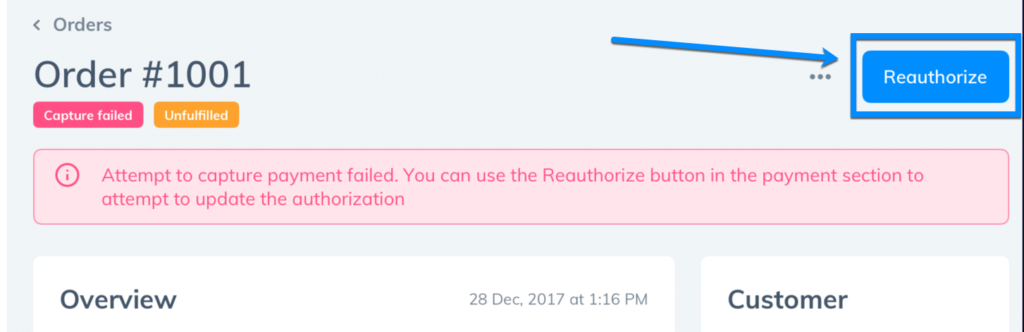
Sometimes an attempt at a payment capture fails, most often because the authorization expired.
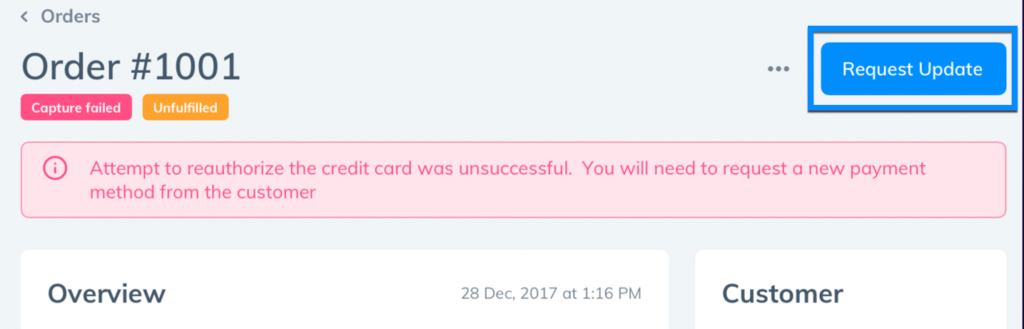
You’ll see a red Capture Failed tag for the order. An error message also appears.
To try again, simply click the Reauthorize button.
If the reauthorization fails, you must request a new payment method from the customer. To do so, click on the Request Update button to send an email notifying your customer.
Cancelling an Order
Prodigy makes it easy to cancel orders right from any Order page.
Go to Orders in Prodigy, then select the order you want to edit.
Choose the “…” ellipsis link to reveal a dropdown with two options: Cancel and Archive. Pick the Cancel button.
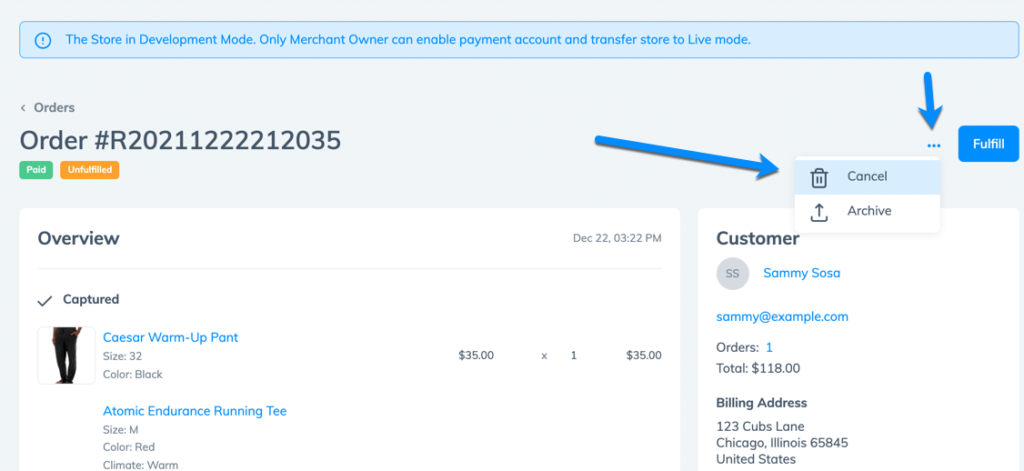
A popup window appears asking you about the reason for cancelling.
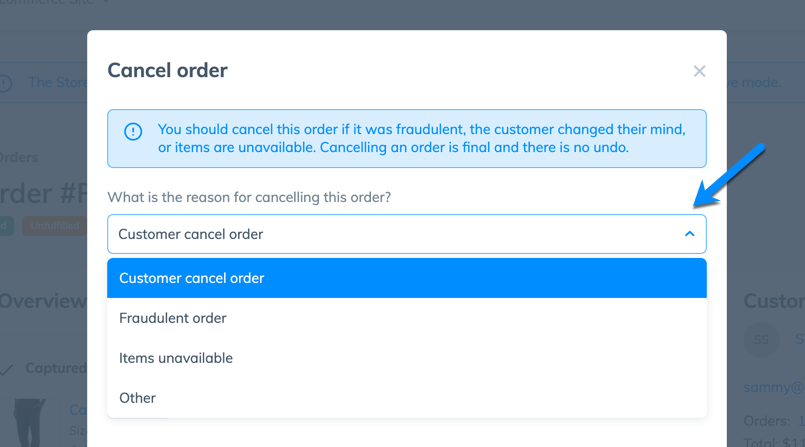
Mark the reason for your own records and click the Refund and Cancel button.
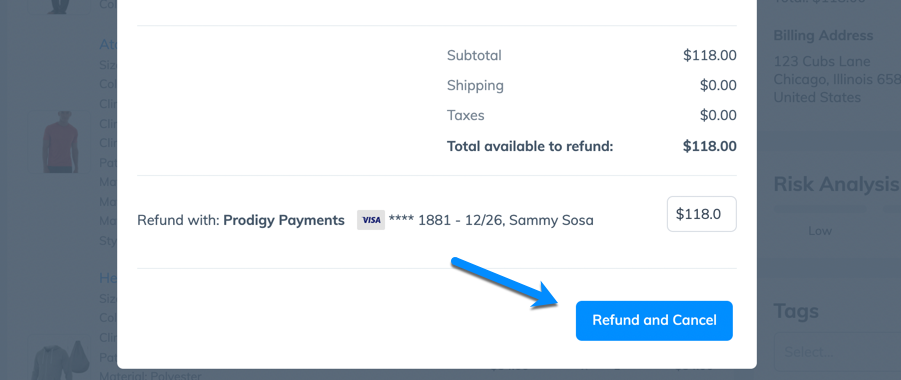
All cancelled orders get greyed and crossed out in the Orders list. They also receive Refunded and Unfulfilled tags to separate them from other orders.

The Option to Archive Orders
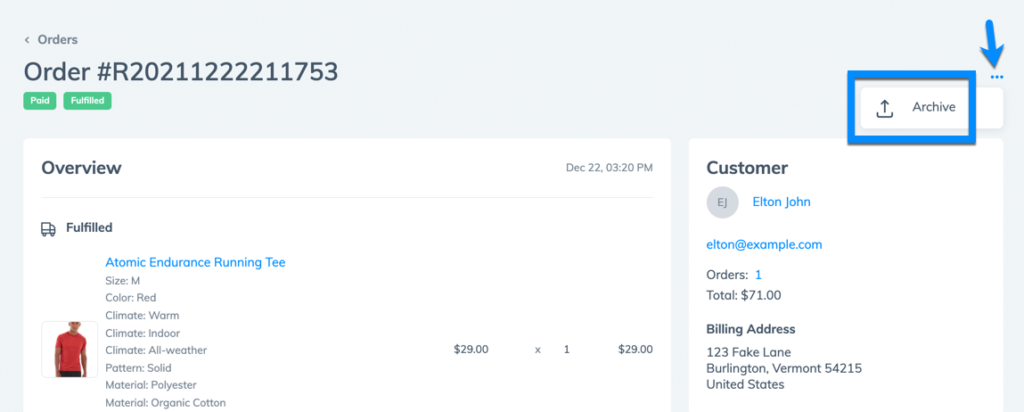
The Archive order function in Prodigy helps to organize the order list and remove old or unneeded orders from the main screen.
To archive, choose an order from the Orders page. Click the “…” ellipsis link, then the Archive option.
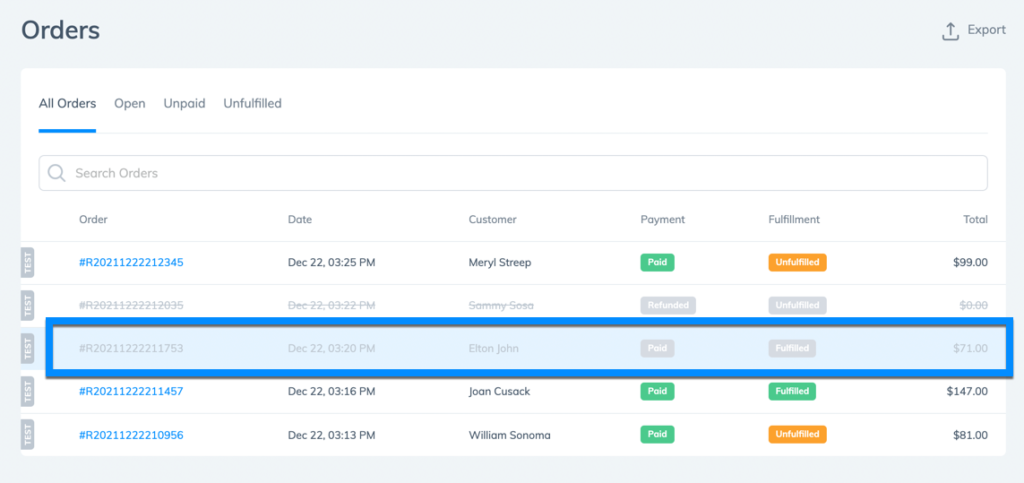
Archived orders get greyed out like cancelled orders, but not crossed out. You can archive any type of order, even if it’s paid and fulfilled.
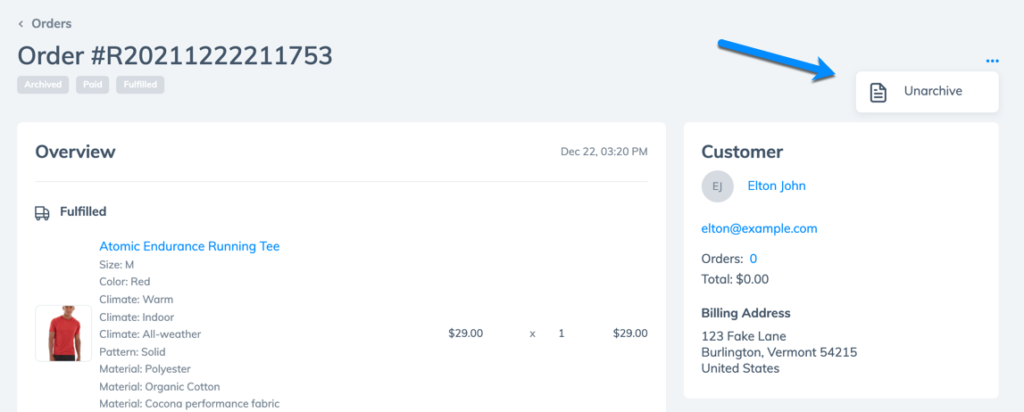
To reverse a previously archived order, open its page, click on the “…” ellipsis link, and select Unarchive.
How to Create Manual Orders (Draft Orders) in Prodigy
Draft orders empower store owners to input orders from the backend of Prodigy, for when you accept an in-person, over-the-phone, or through email order. This way, the customer doesn’t have to complete the payment through your website, but can still make a purchase.
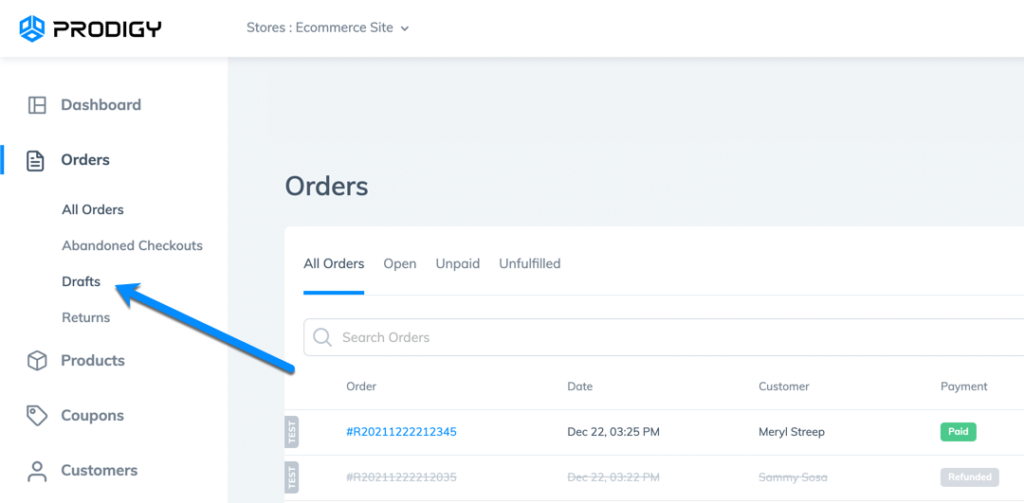
These manual orders are called Drafts in Prodigy. You can manage them by going to Orders > Drafts.
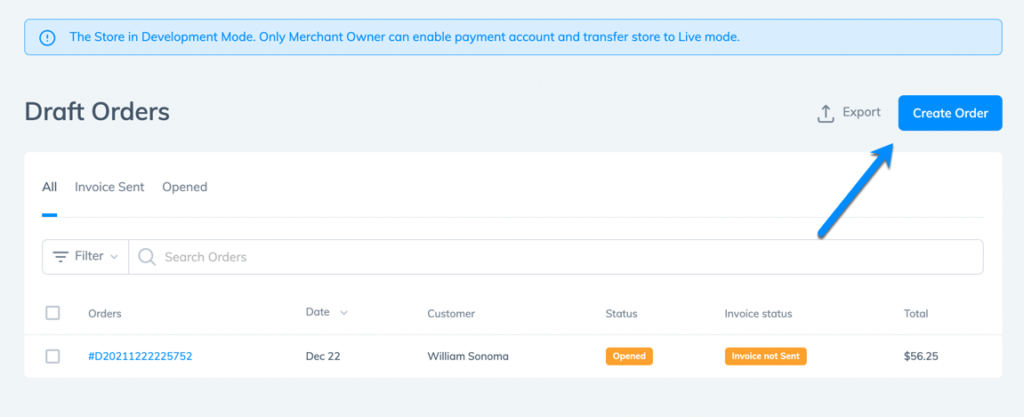
The Draft Orders page lists all current and past draft orders.
To make a new one, click the Create Order button.
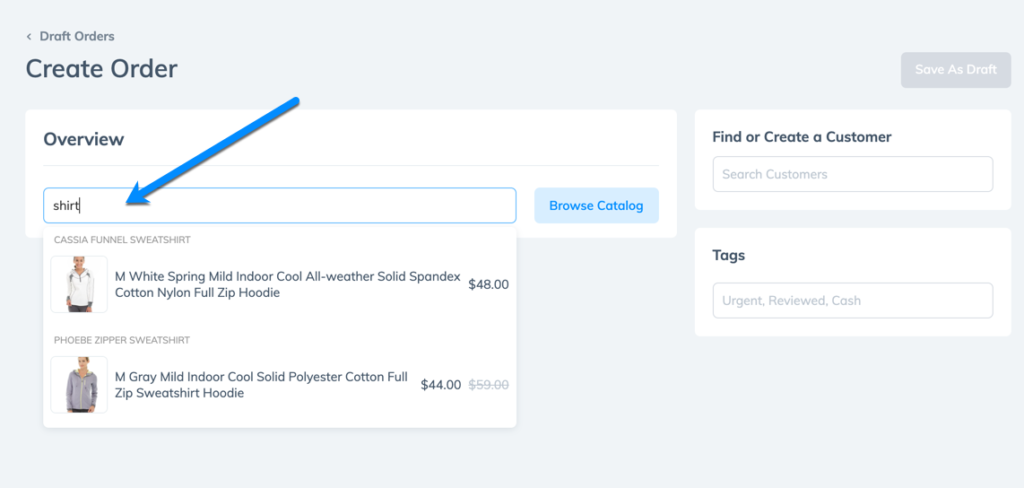
Begin the draft order by searching for a product or using the Browse Catalog button to add items to the order.
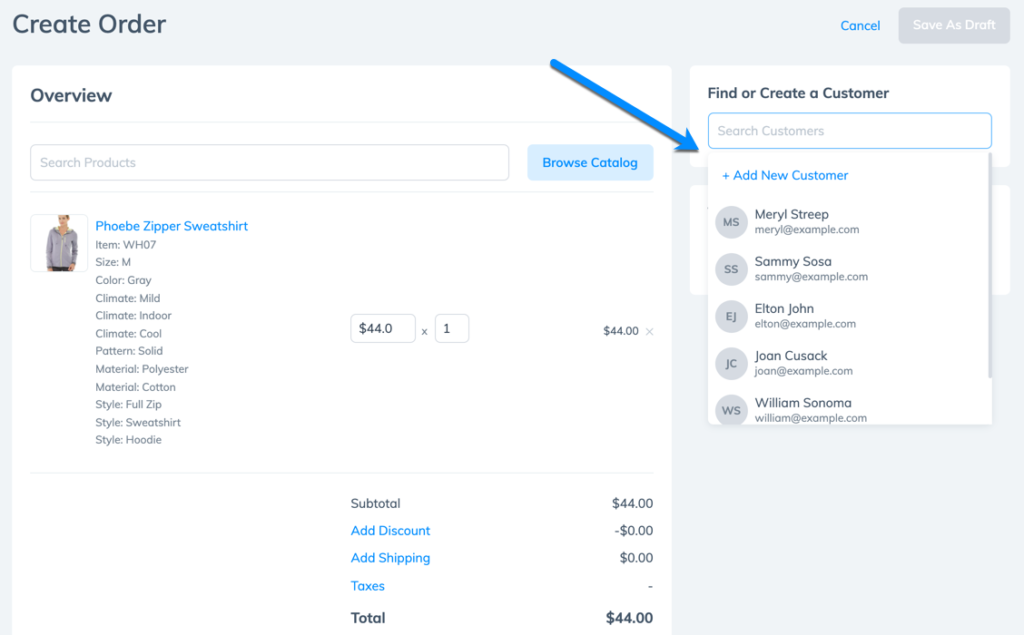
You can then search for current customers or add new customers to attach someone to the order.
The Save As Draft button remains grey until you click on the Add Shipping link at the bottom of the invoice.
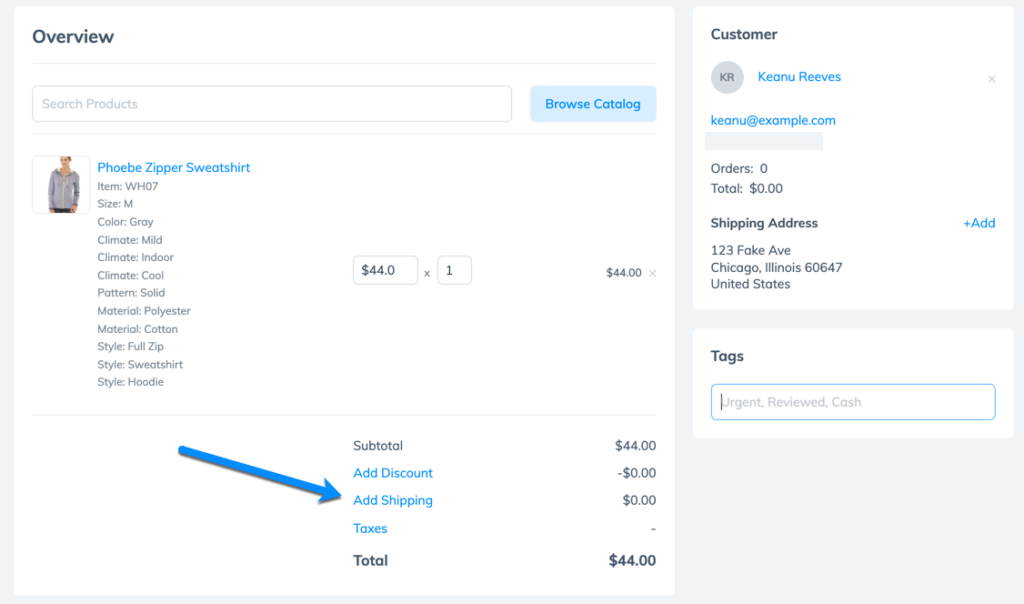
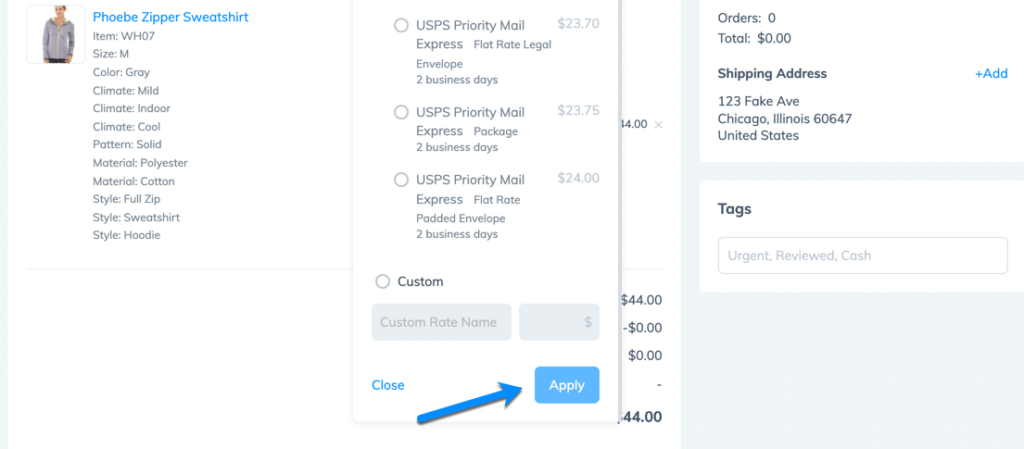
This feature allows you to choose a USPS shipping method.
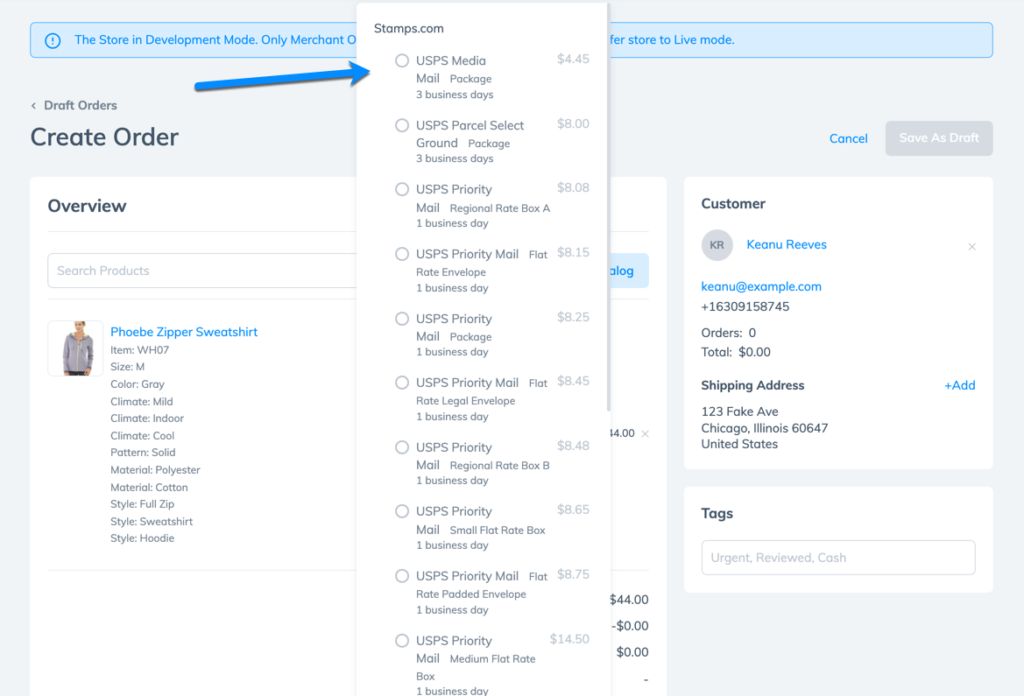
It’s also possible to add a custom shipping rate. Click the Apply button when you’re done.
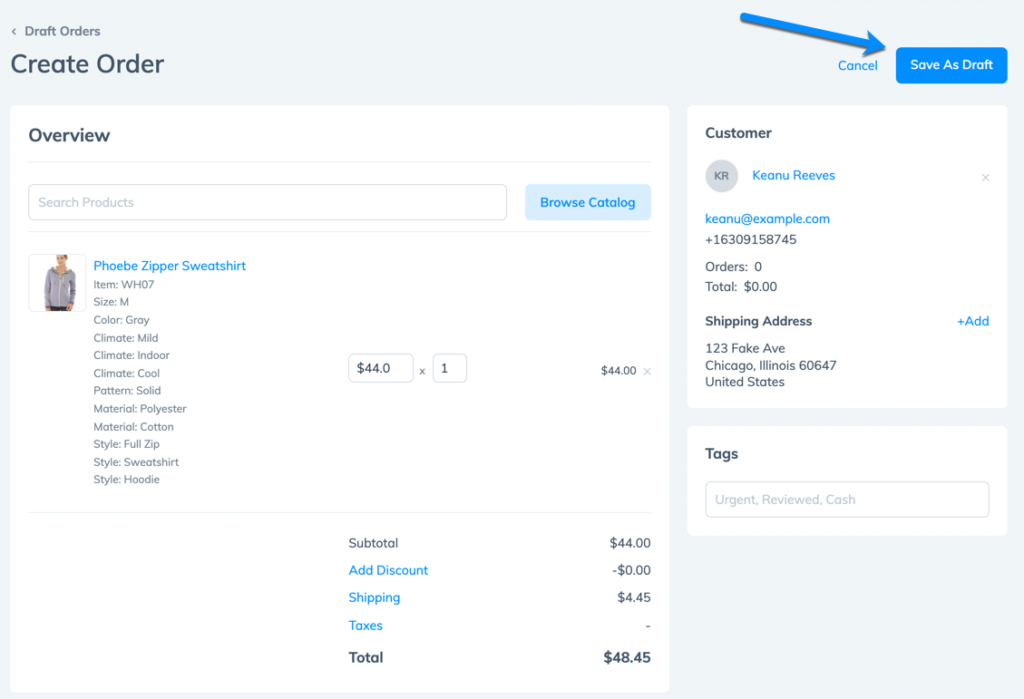
Click Save As Draft to complete the order.
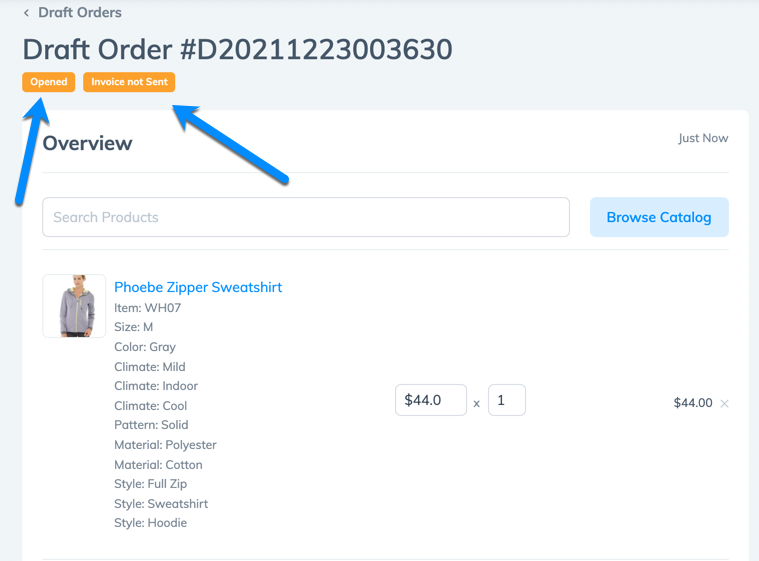
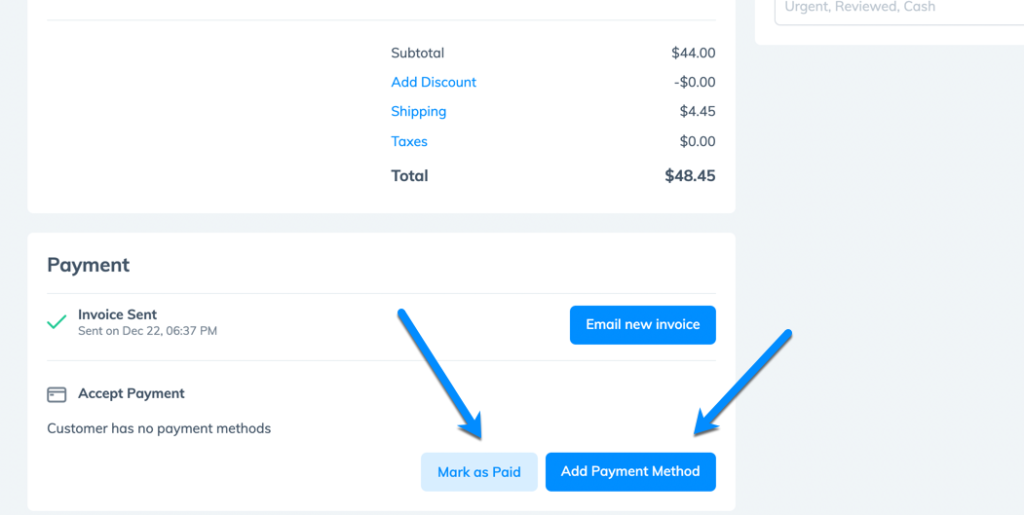
Prodigy tags all new draft orders as Opened and Invoice Not Sent.
Scroll down on the order to locate the Payment section. Here, you’re able to click Email Invoice, which prompts you to send the order details to the customer for them to make a payment.
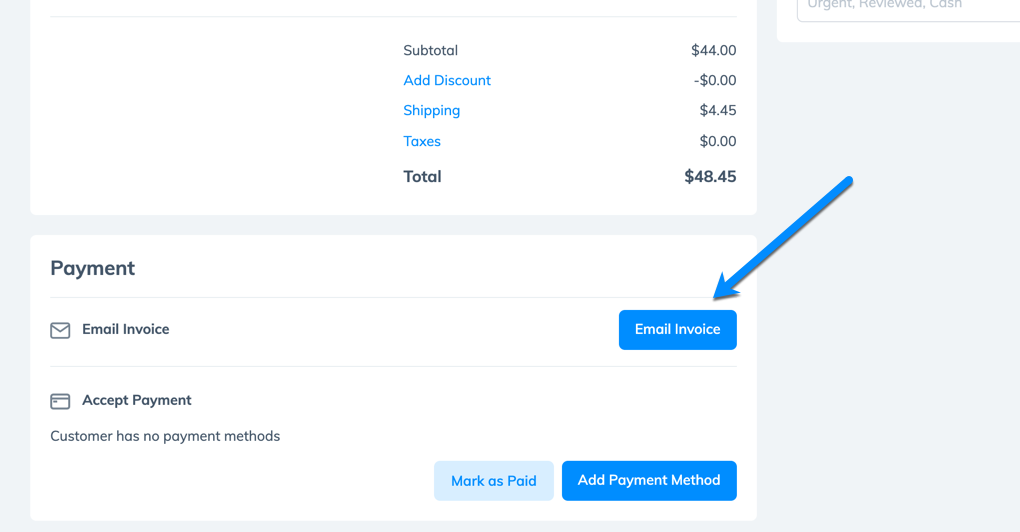
You’ll also want to accept payment for that order. If you receive payment via cash, check, or some other form that’s not a credit card, click on the Mark As Paid button.
Otherwise, you can ask for the customer’s credit card information and use the Add Payment Method button.
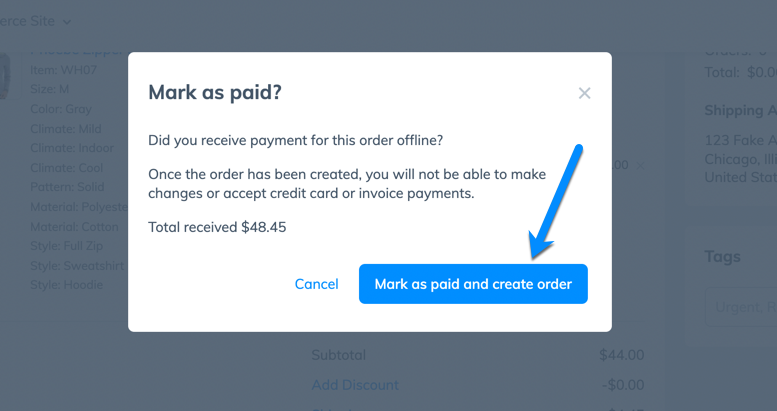
After clicking Mark As Paid, you’re prompted to click the Mark As Paid And Create Order button.
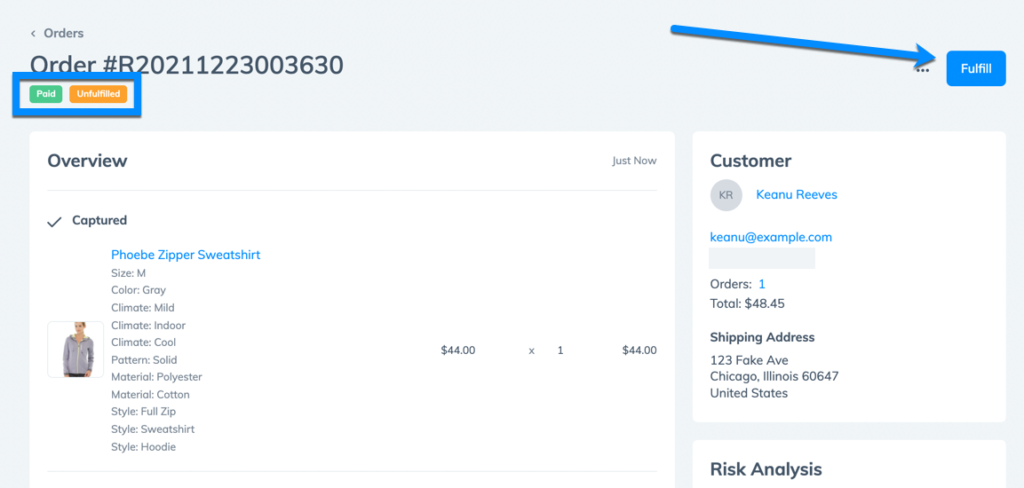
After that, the order is paid for, but you still have to fulfill it. Choose the Fulfill button to walk through that process.
How to Export Orders for External Use
Store owners may want to export a CSV file download of their order list to print out, share with other stakeholders, or store in their files.
To export, open the Orders page in Prodigy, then click on the Export button in the top right corner.
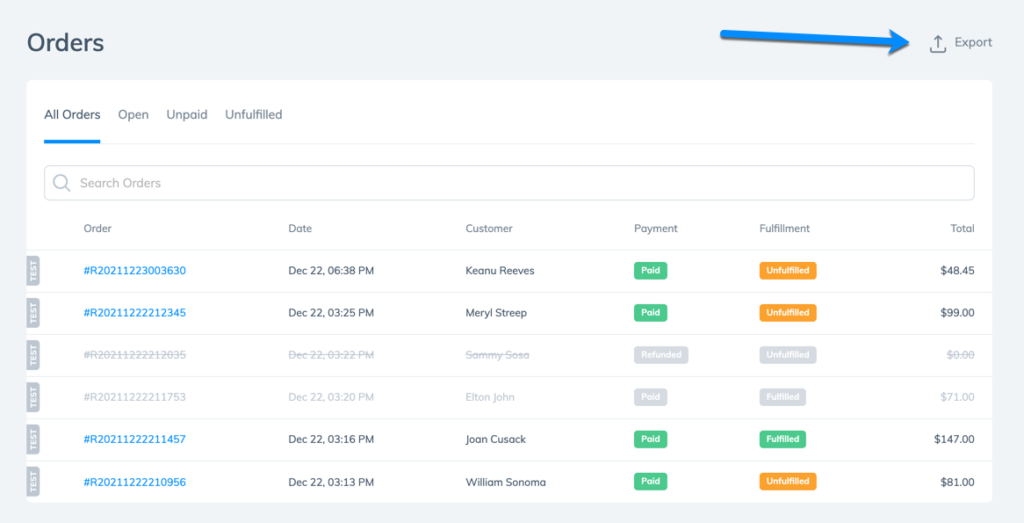
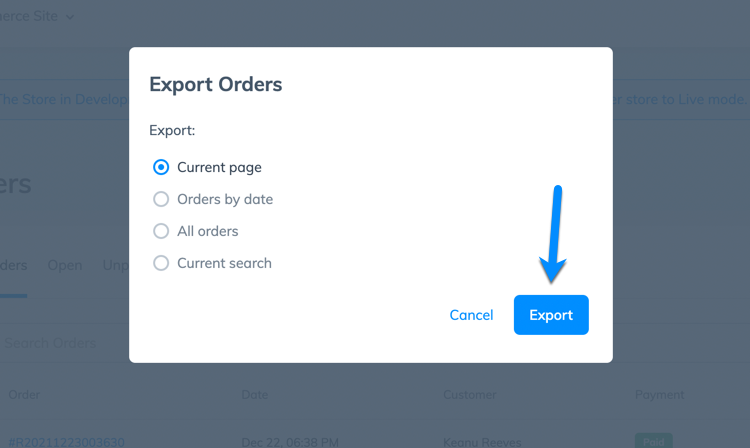
A popup appears to identify which orders to export. Click Export to finish.
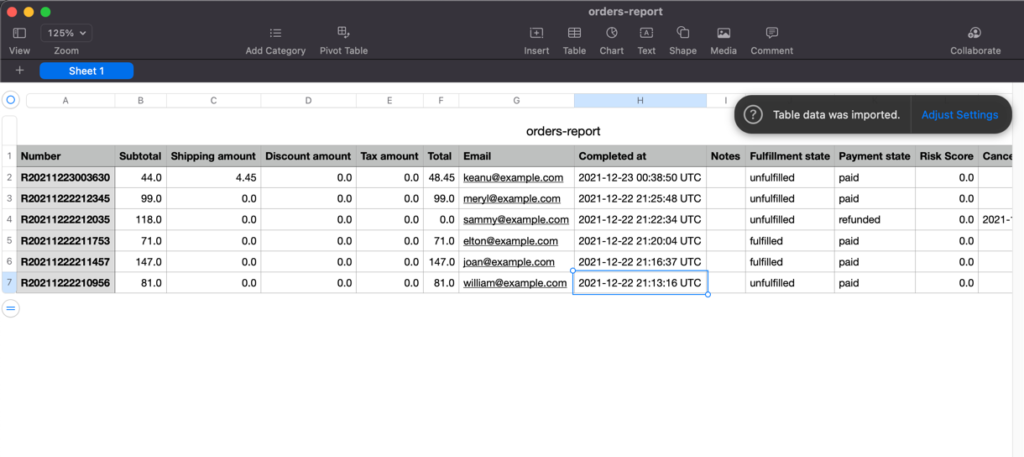
The order list downloads to your computer, which you can then open as a CSV file in Excel, Numbers, or any other supported spreadsheet tool.
How to Analyze Orders for Potential Risk
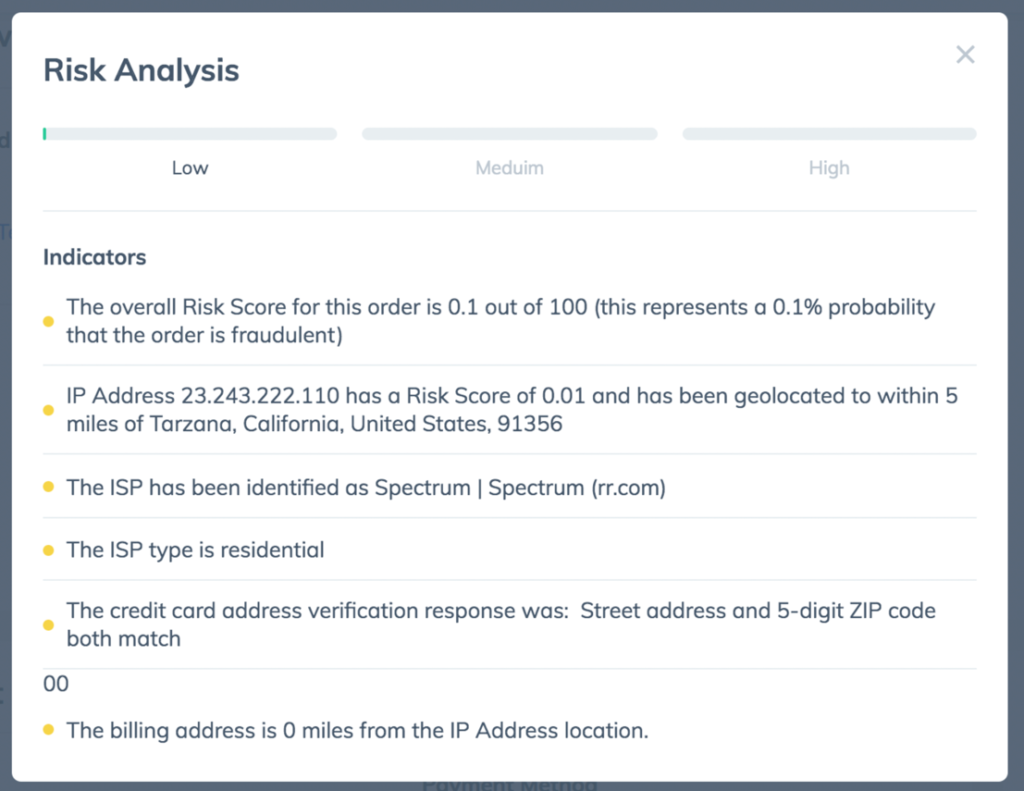
Prodigy provides a unique risk analysis tool to check whether an order holds any level of risk for fraud. To view an order’s risk potential, go to the Orders page in Prodigy, and select any order you want.
The Risk Analysis module is on the right side of the screen, where it presents a range from Low to High risk.
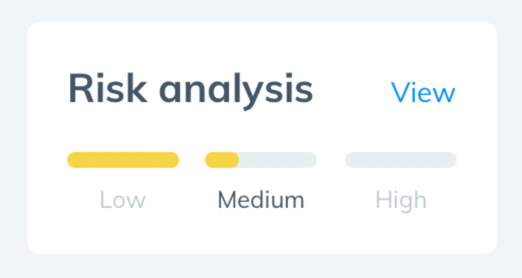
Click on the View link to see more information about why the order has a certain risk level. Prodigy uses factors like IP address, internet service provider, credit card address verification, and the distance between the billing address and IP address location to establish a risk score.
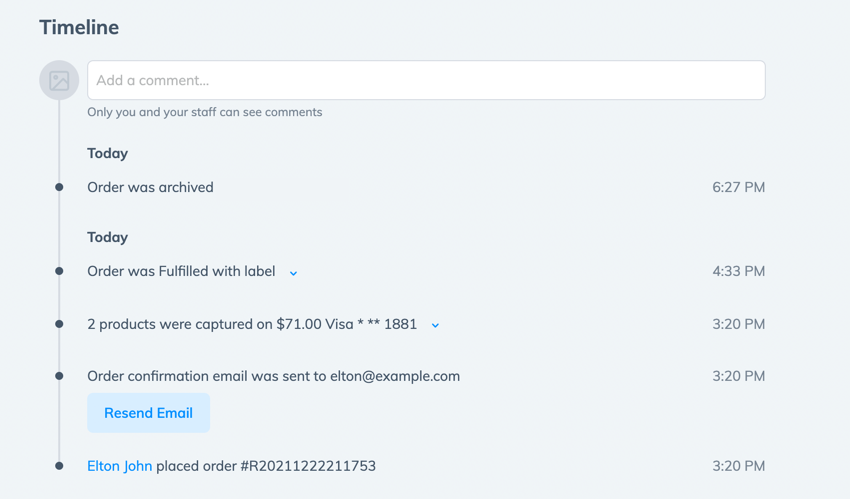
How to Check an Order’s Timeline in Prodigy
Ecommerce orders go through several stages, including order placement, email confirmation, payment authorization and capture, and fulfillment.
Therefore, Prodigy logs every step of an order’s movement in the system, allowing store owners to go back to examine the history.
You can find every order’s unique timeline by going to the Orders page and selecting an order. Scroll to the bottom of the page to view the Timeline and potentially add comments.
How to Manage Refunds and Returned Orders in Prodigy Commerce
Refunds and returns should not only be painless for the customers but also the merchant. That’s why Prodigy includes quick refund and return features within the Orders page.
Select an order from your list to start a refund. Refunds are only possible if the Payment tag is Paid and the Fulfillment Tag is Unfulfilled.
In the Payment section, find and click the Refund button.
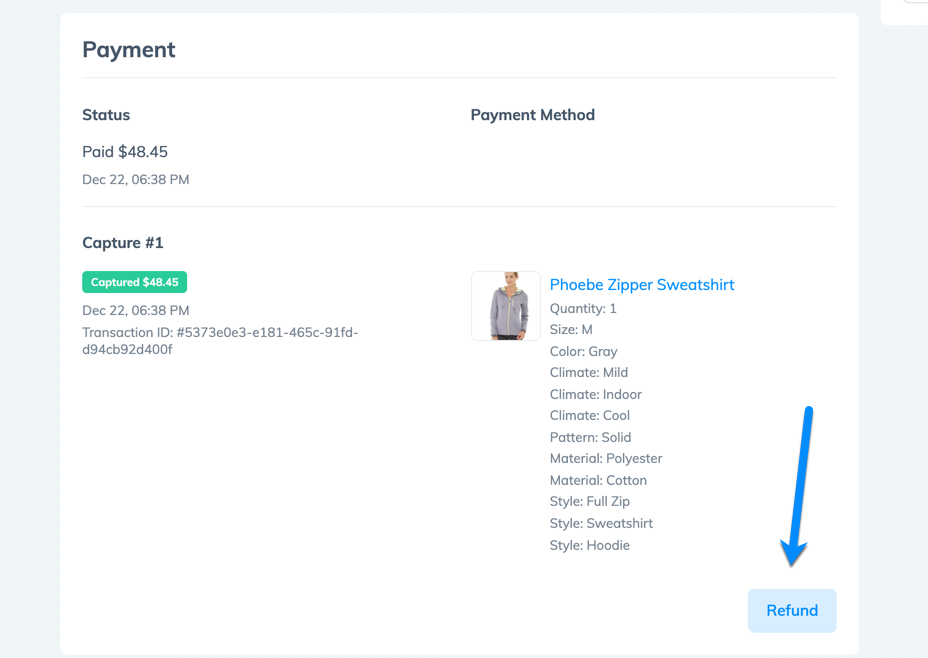
It’s optional to fill in a reason for the refund, after which you can click on the Refund Order button.
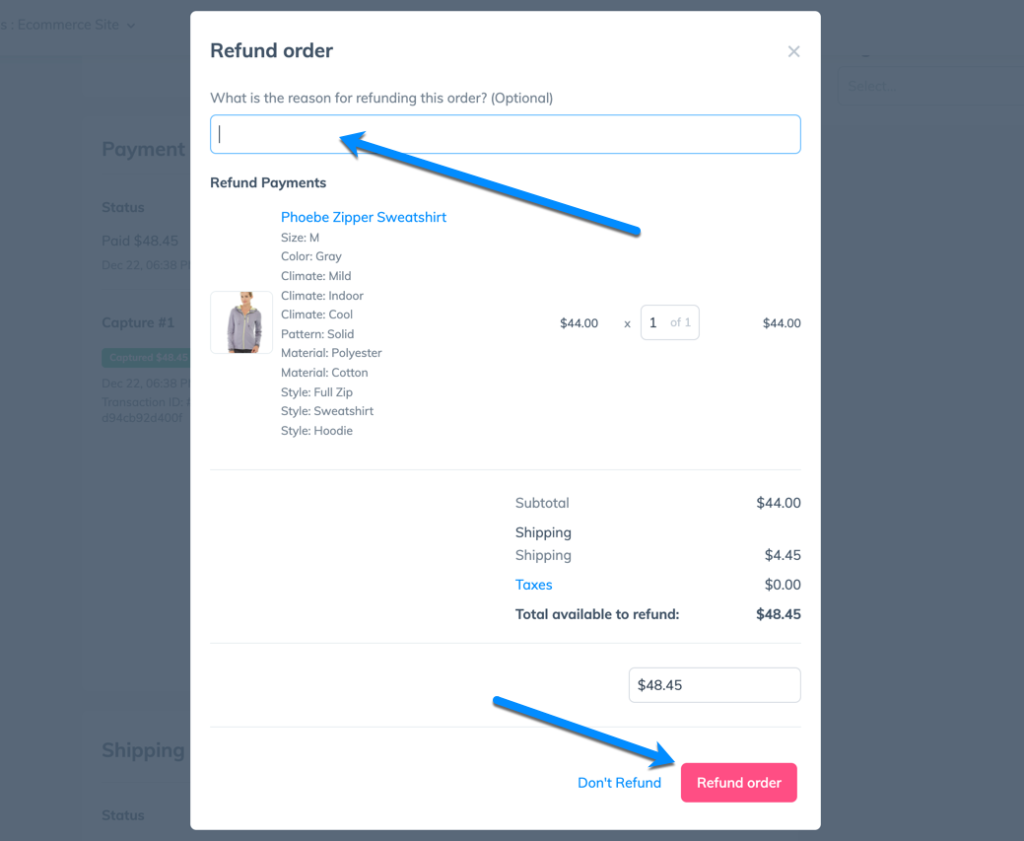
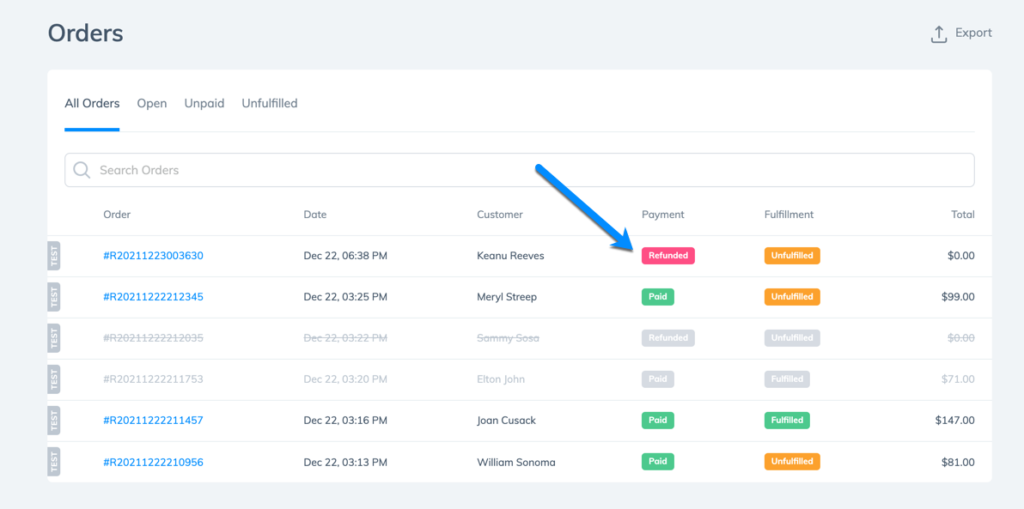
All refunded orders receive a red Refunded tag in the Prodigy Orders list.
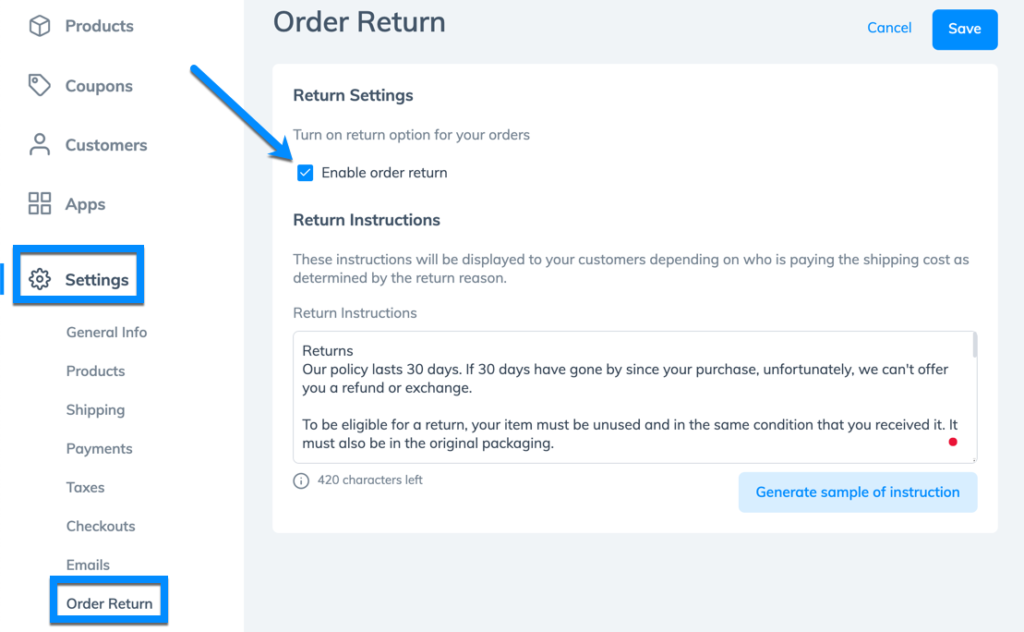
Enabling Order Returns
In Prodigy, you must turn on a setting to allow returns. This is done by going to Settings > Order Return. Check the Enable Order Return box, then you can generate a sample of return instructions for the customer which you can tailor. This message gets displayed to customers when necessary.
Click the Save button.
Processing a Return
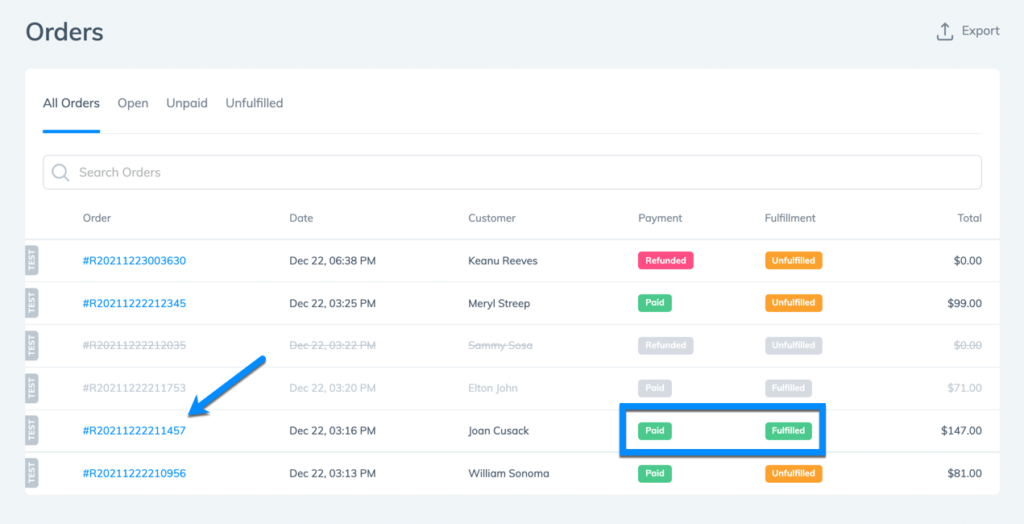
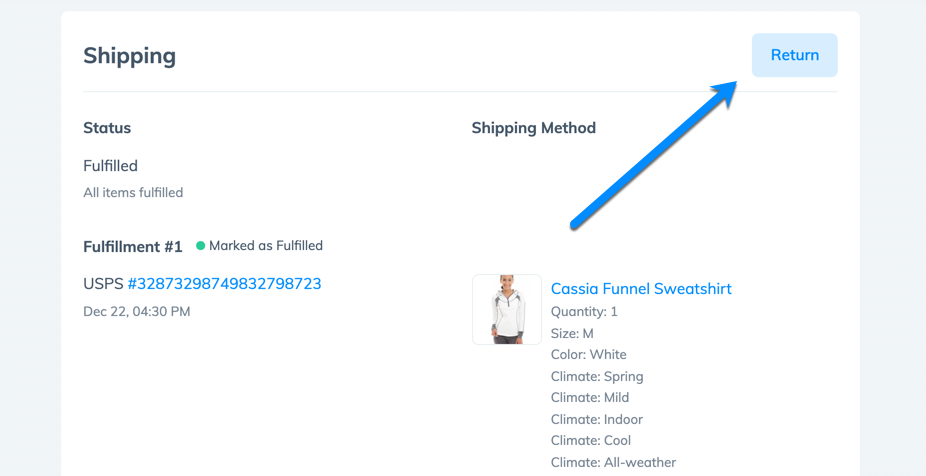
To complete an order return in Prodigy, the order must show Paid and Fulfilled tags, seeing as how the customer needs to actually have the product in their possession.
Click the order to start with the return.
Under Shipping, find and click the Return button.
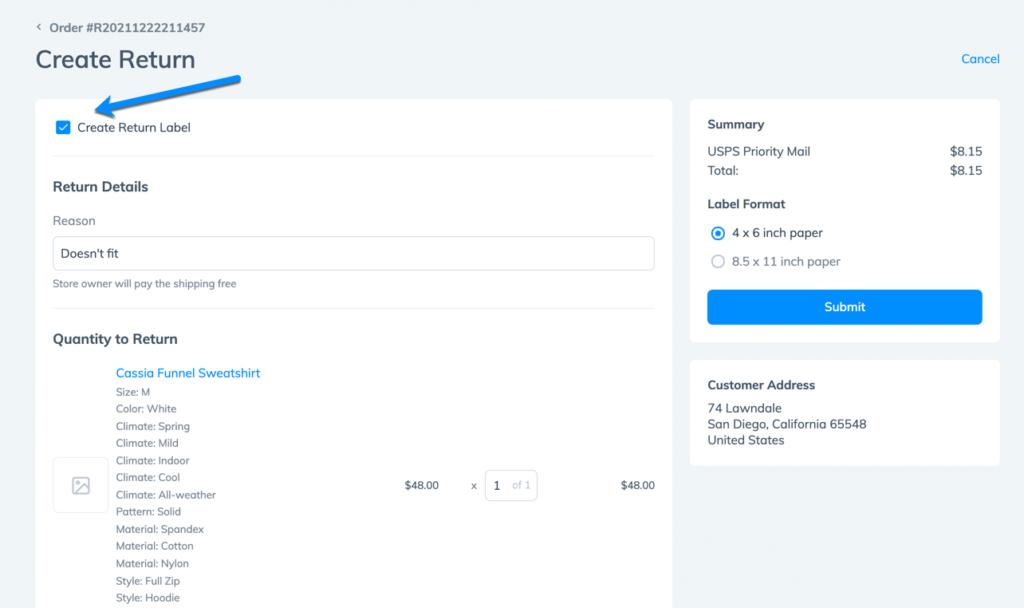
Check the Create Return Label box.
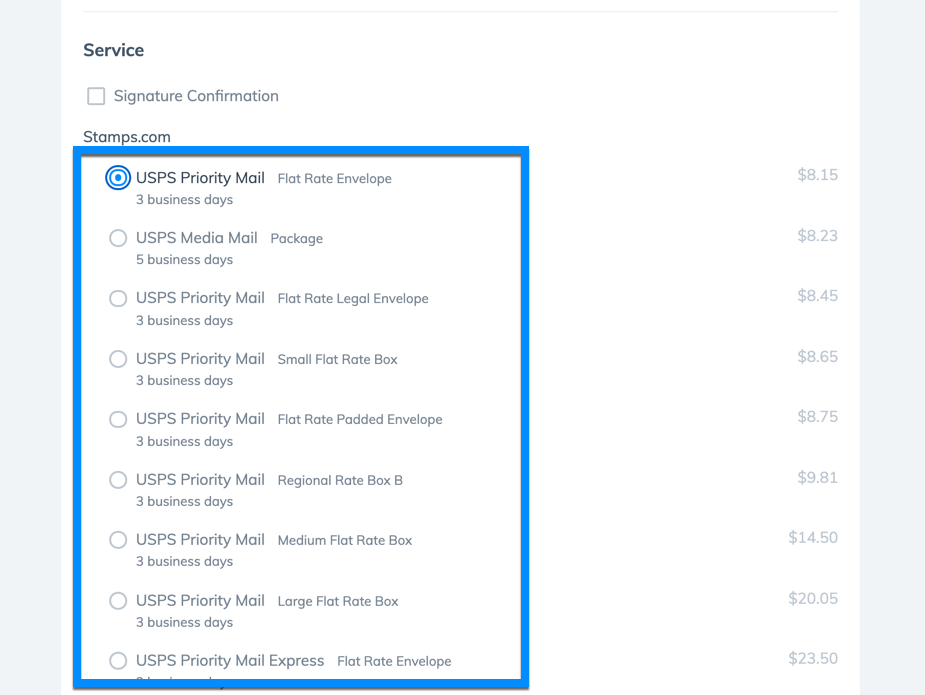
Scroll down to the Service section to choose a USPS shipping method for that return. You can also opt to require a signature confirmation.
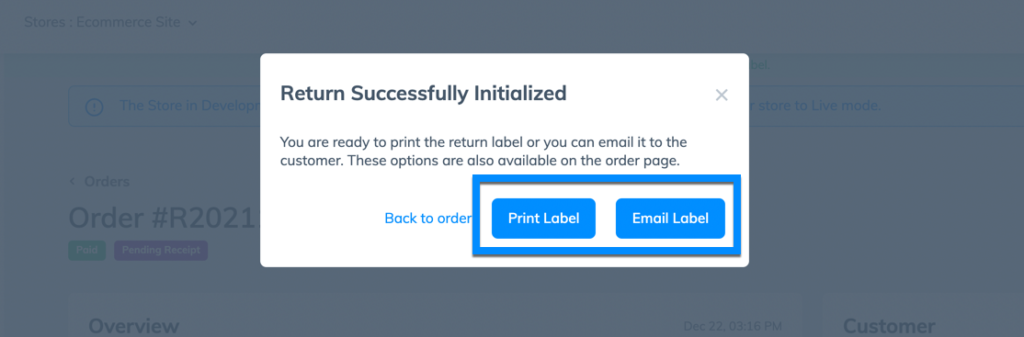
With the shipping method set, you can pick a return Label Format, then click the Submit button.
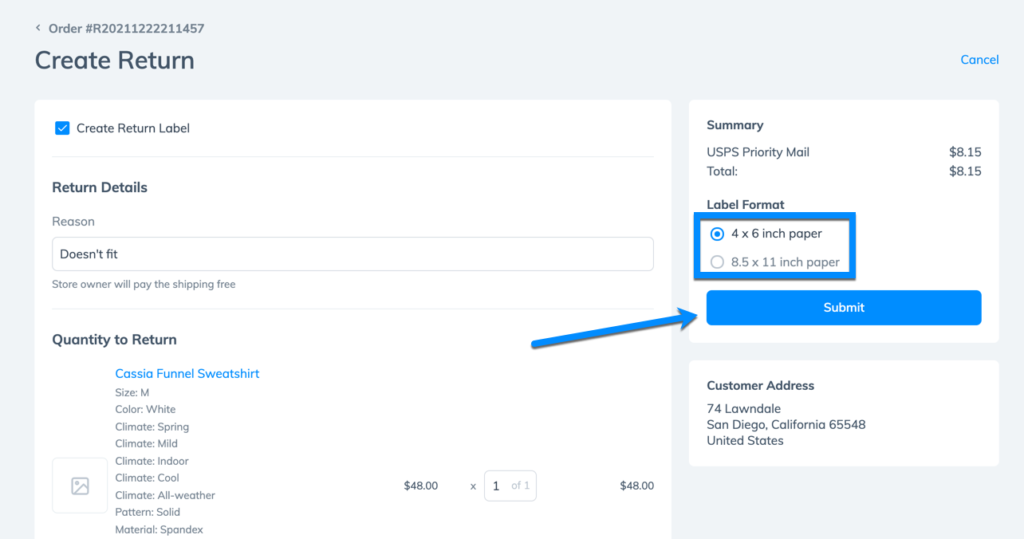
Two options are available at the end:
- Print Label: This allows you to print out the label if necessary.
- Email Label: This sends a prepaid PDF return label to your customer’s email address on file.
Try Prodigy Commerce for a Superior Order Management Experience
Order management is only the start to how Prodigy Commerce excels when compared to other WordPress eCommerce solutions like WooCommerce. Read about the entire Prodigy Commerce platform, and contact the Prodigy support team if you have questions. Sign up for a free Prodigy account to launch a better online store today.