Prodigy Commerce makes product management pleasant for store owners by providing all necessary product management tools, while also offering simple (yet powerful) settings for adding products in bulk, customizing pricing, creating product variants, and much more.
In this guide, we show Prodigy store owners every aspect of product management, demonstrating its simplicity over more cumbersome WordPress eCommerce solutions like WooCommerce that are not intuitive.
- How to Create a Product
- Add Images to the Product Page
- Set the Product Price (And Optional Sale Price)
- Manage Inventory Settings
- Add Shipping and Tax Details
- Setting and Customizing Attributes and Variants
- How to Add and Manage Attributes
- Set Search Engine Listing Elements
- Adding Related Products for Up-selling and Cross-selling
- Creating and Adding Product Categories and Tags
- Activating a Product and Making it Visible
- How to Import and Export Products
- Organizing, Hiding, Filtering, Searching, and Deleting Products
How to Create a Product
All product management features are located under Products in the Prodigy dashboard menu.
Here, you’ll find three sub-menus:
- All Products
- Categories
- Attributes
To add a new product, you can either click on Products or All Products.
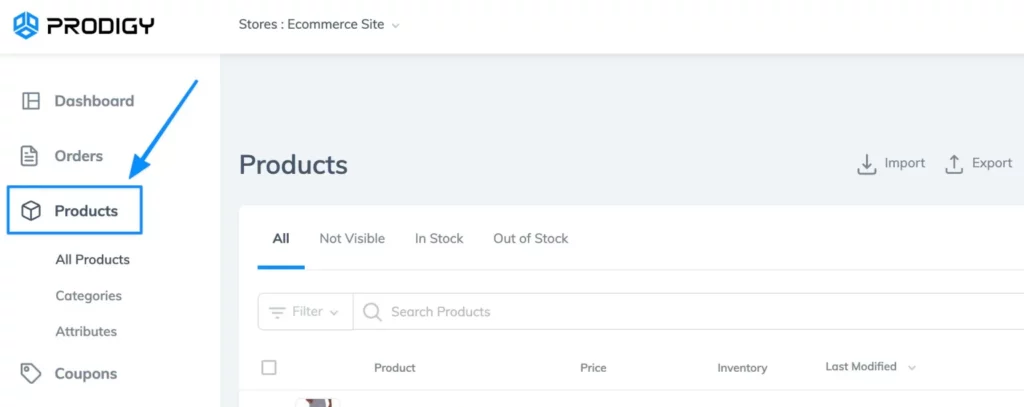
This brings you to the Products page with a list of all current items you have in your store. Click on the Create Product button to add an item.

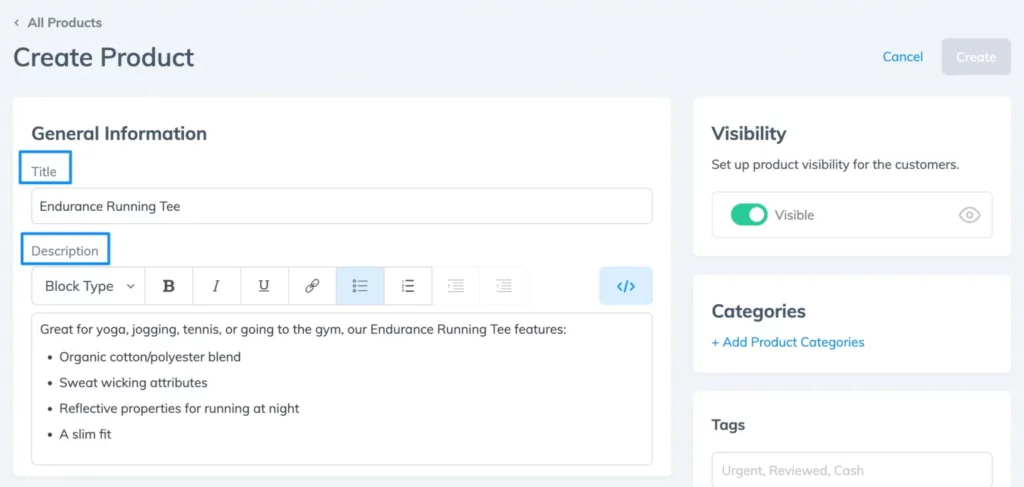
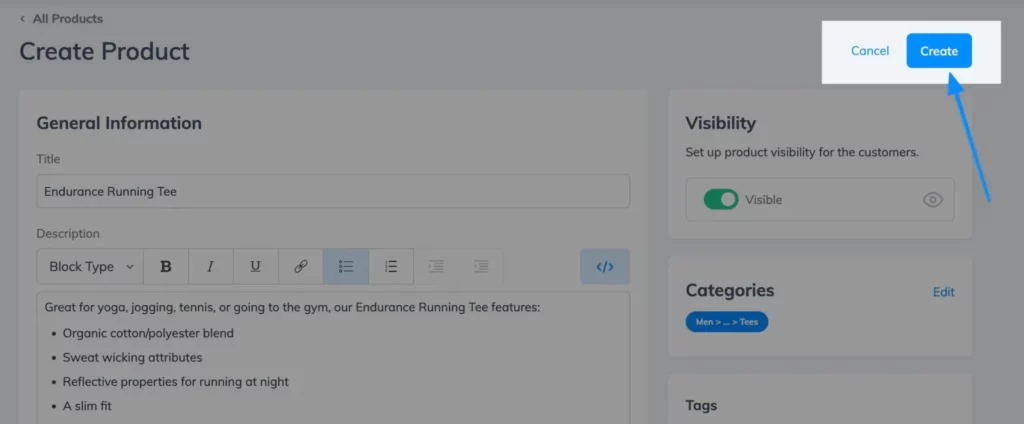
The Create Product page offers several fields to fill in information, add media, and adjust categories for your product. Start by filling in the Title and Description.
Note: The Description field offers formatting tools for text, such as options for bolding, adding bullet points, and incorporating your own code.
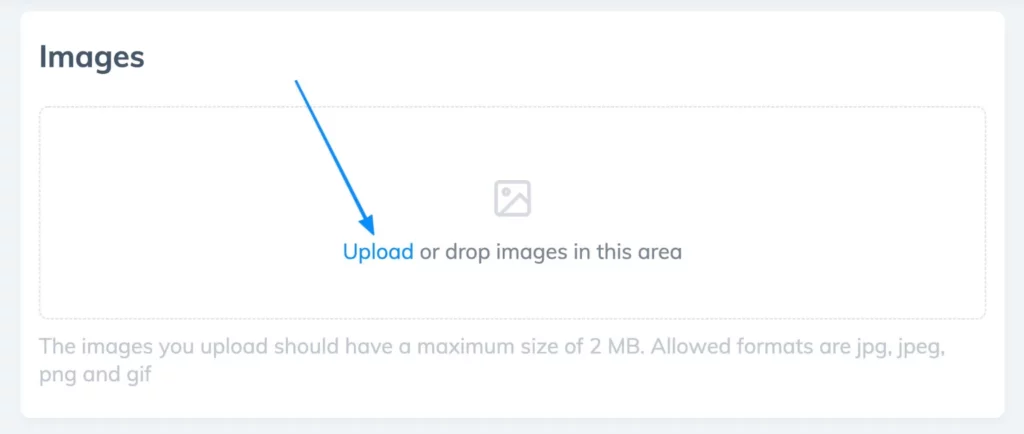
Add Images to the Product Page
Scroll down to the Images section and click on the Upload link to add images from your computer to the product page. You can also drag and drop images into this module.
After uploading an image of your product, feel free to crop its dimensions. Click Apply when you’re done.
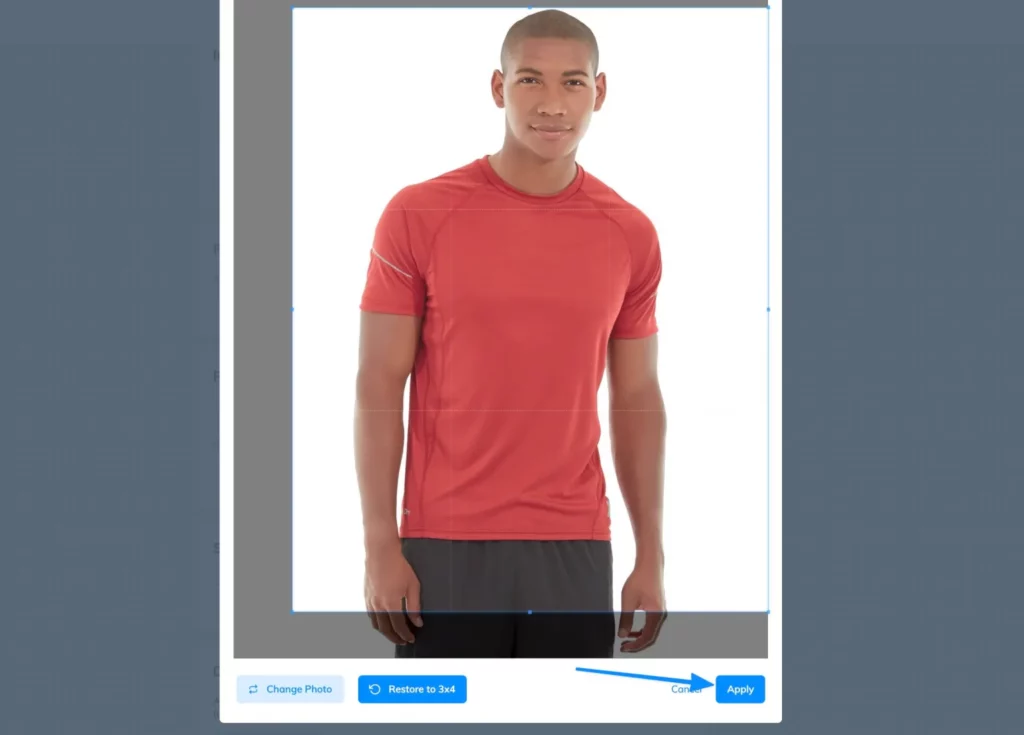
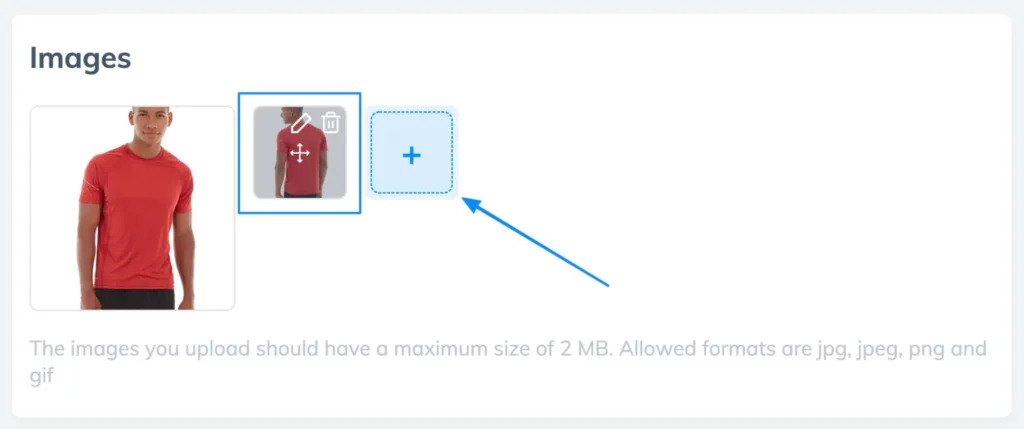
Image thumbnails appear as you add them. Scroll over an image thumbnail to reorder, edit, or delete the image. The “+” button is always there for you to add more photos to your product page.
Set the Product Price (And Optional Sale Price)
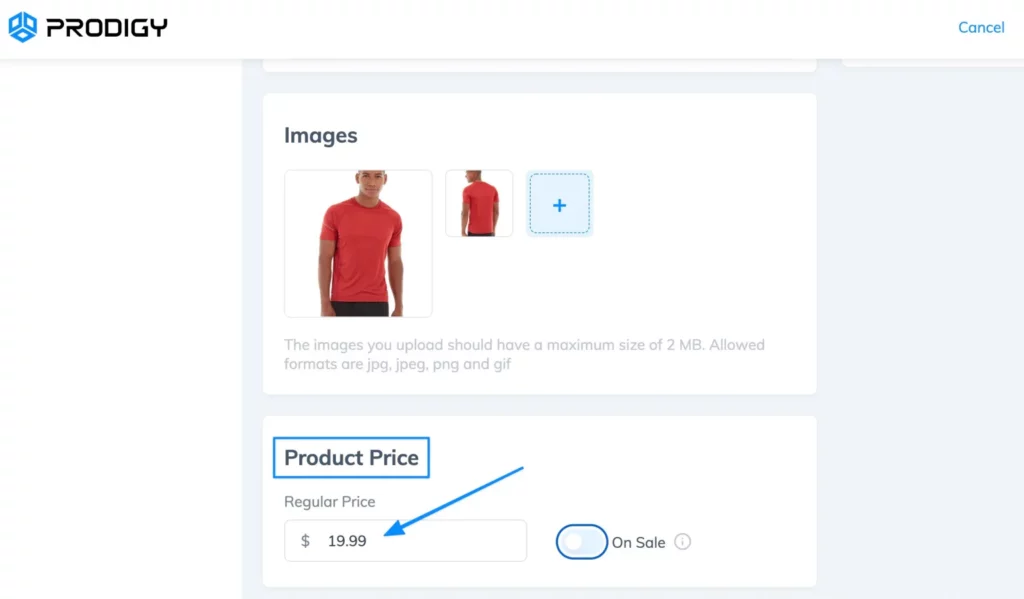
Below the Images module, you’ll find an area to set the Product Price. Fill in the Regular Price field with whatever you plan to sell the item for.
Whenever you’re running a sale, flip the On Sale switch, then add a Sale Price and Sale Period.

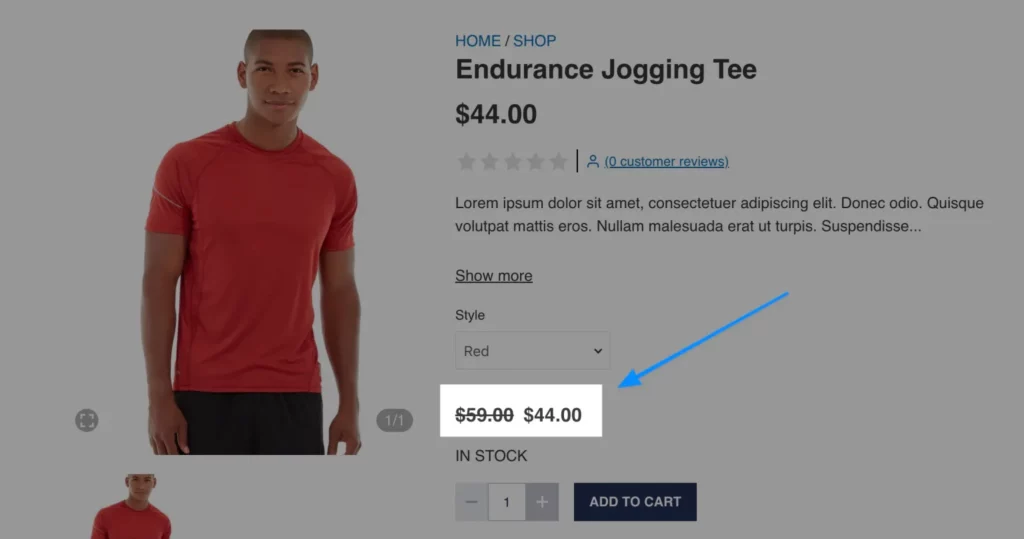
With Sale Price active, the product page frontend reveals a crossed-out retail price and the sale price next to it.
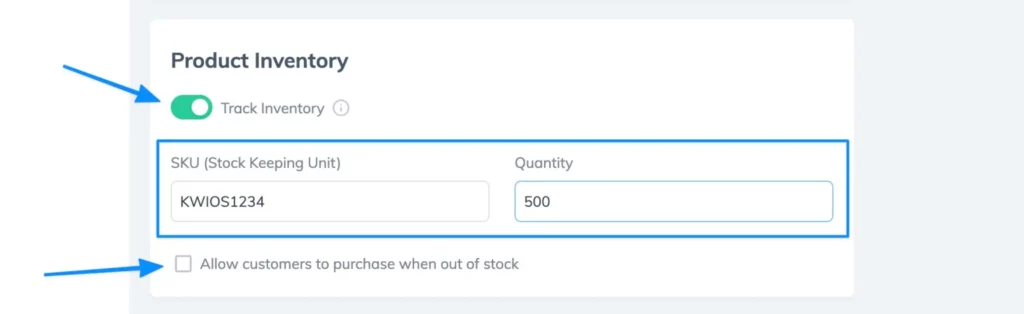
Managing Inventory Settings
You can also manage product inventory settings on the same page. Under ProductInventory, flip the Track Inventory switch if you plan to utilize this feature.
Other fields include:
- SKU (stock keeping unit)
- Quantity
- Allow Customers To Purchase When Out Of Stock
Hide/Show Out of Stock Items
You may want to hide out of stock products if you’re not allowing customers to purchase them. On the other hand, you should show out of stock products on the frontend if you’re still permitting sales of those items.
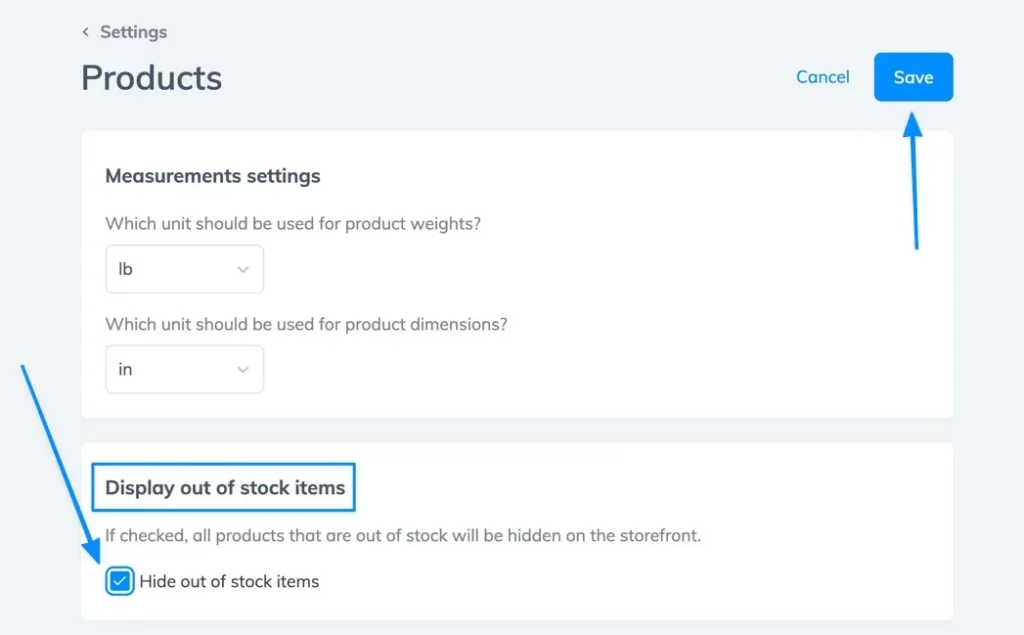
To hide or show out of stock items, go to Settings > Products.
Check the box to Hide out of stock items, or leave it blank to keep them on-display. Click Save when you’re done.
Display an “Out of Stock” Message on the Storefront
If you still decide to display out of stock items on the storefront, it’s wise to have a message to tell customers that they can’t purchase a product.
You can find this setting by going to Settings > Products in the Prodigy dashboard.
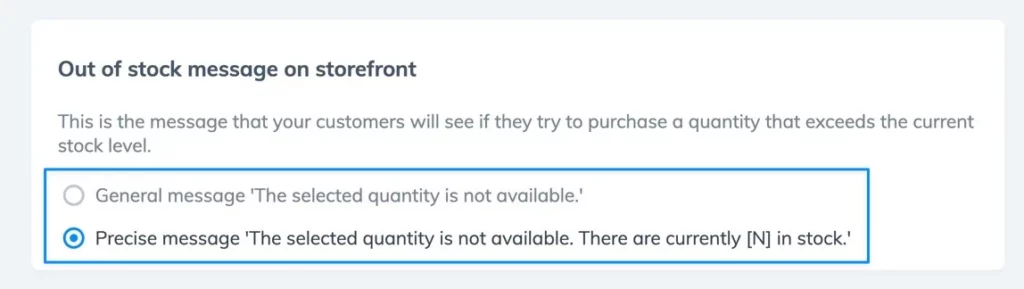
Under the section titled “Out of stock message on storefront,” choose one of the following options:
- General message: ‘The selected quantity is not available.’
- Precise message: ‘The selected quantity is not available. There are currently [N] in stock.’
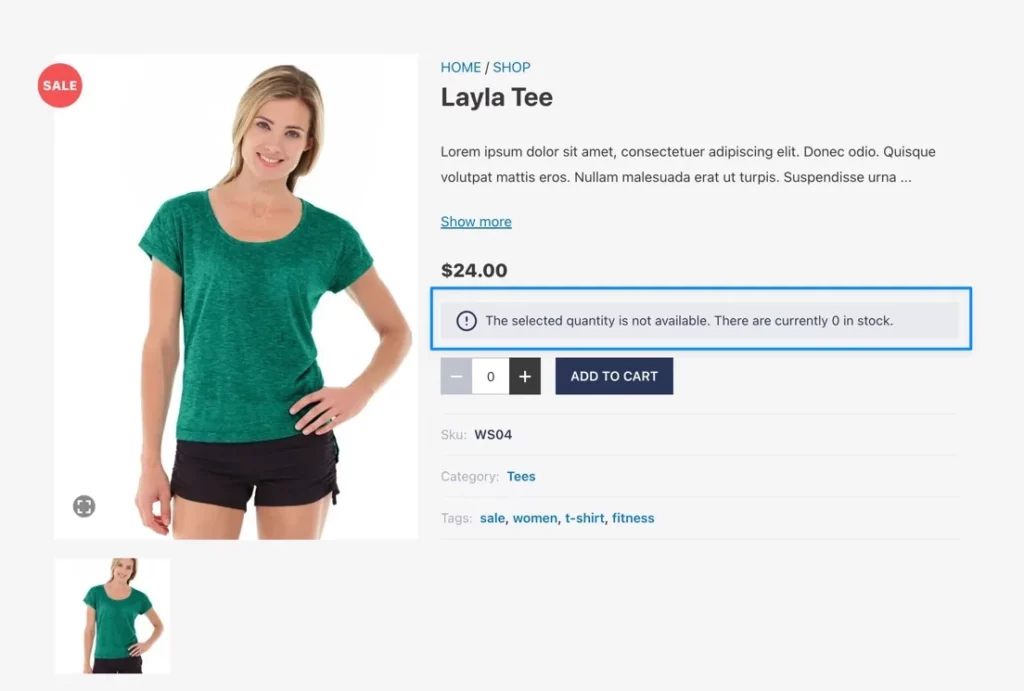
As a result, the specified message type appears on the product page when a user attempts to purchase more items than are available.
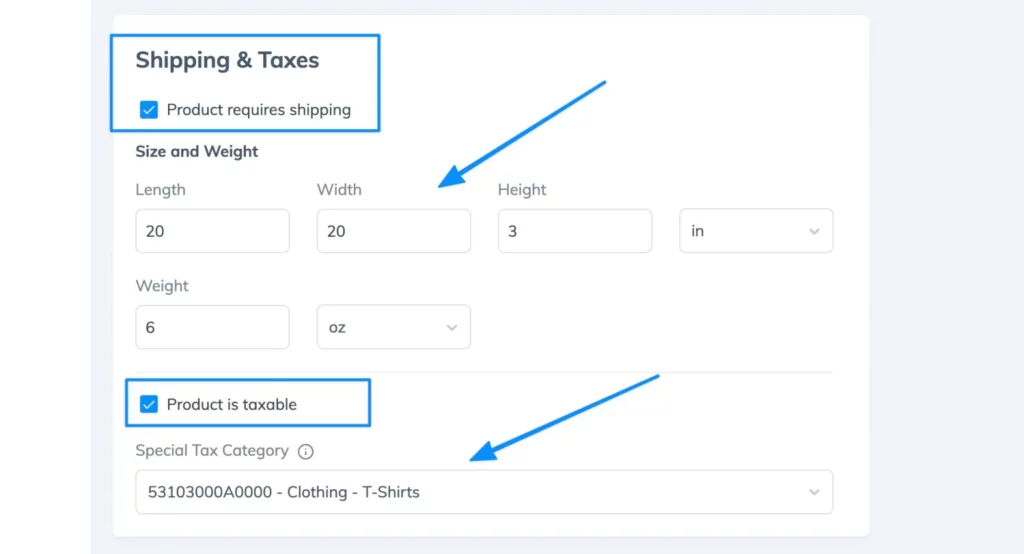
Add Shipping and Tax Details
The Shipping & Taxes section lets you indicate if a product requires shipping or not. Mark the checkbox depending on your situation. You can then type in the size and weight of the product.
It’s also possible to mark the product as taxable. You can simply note that it’s a taxable item or get more specific with a special tax category.
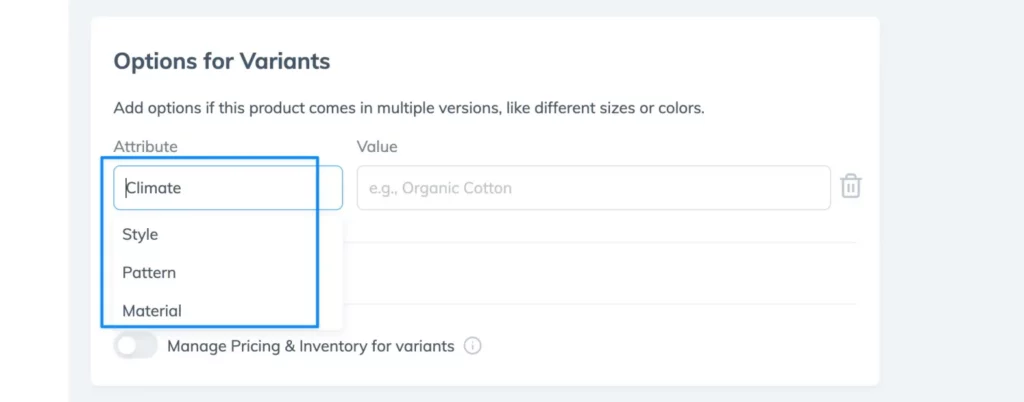
Setting and Customizing Attributes and Variants
In Prodigy, attributes serve as descriptors for customers to filter products. For example, you may create a Material attribute and include values like Cotton, Polyester, and Wool.
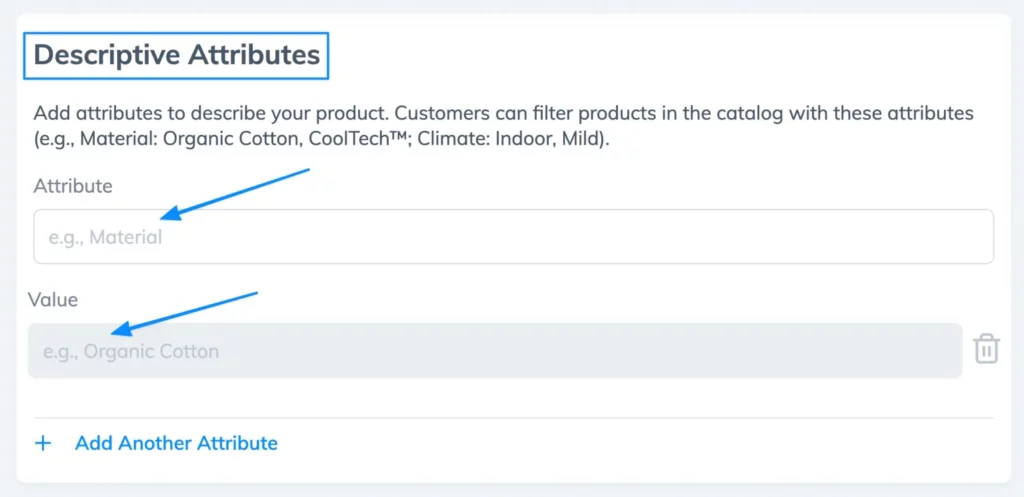
Fill in the Attribute field, then add values by either typing in new ones or choosing from previously created values. Use the Add Another Attribute link to insert more attributes for this particular product.
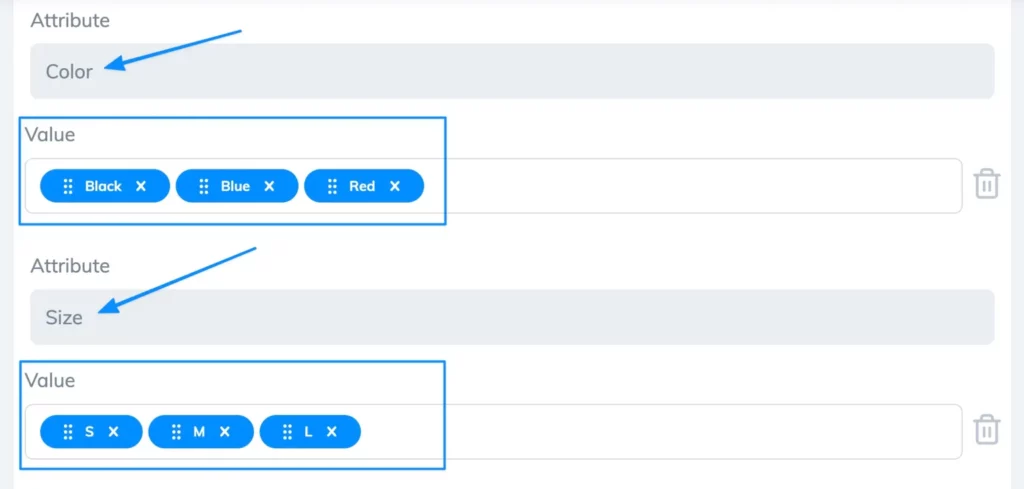
Variants are a little different, in that they add options on the product pages for customers to select when purchasing. Examples include sizes and colors.
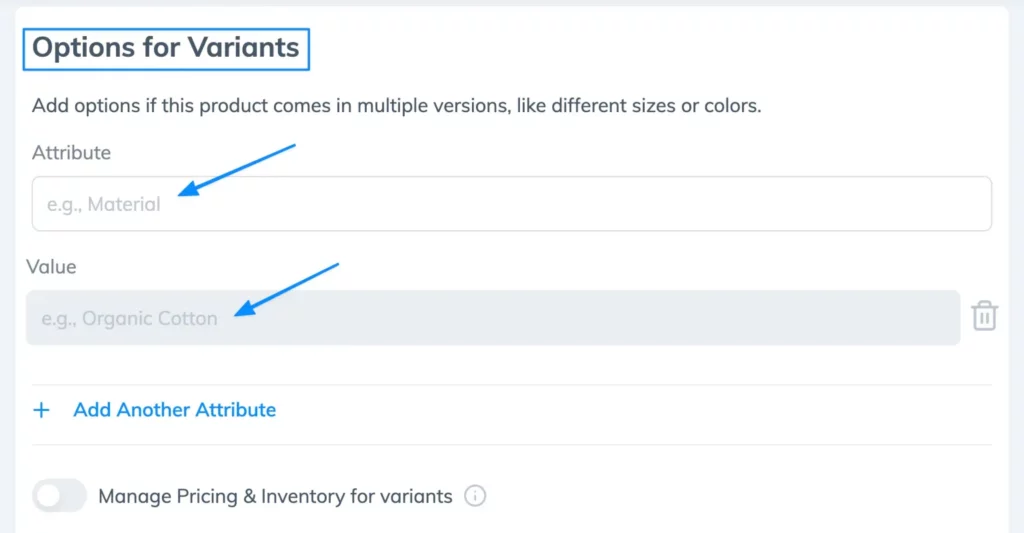
Type in an Attribute for your variant. (You can always add more of these in the Attributes section of Prodigy).
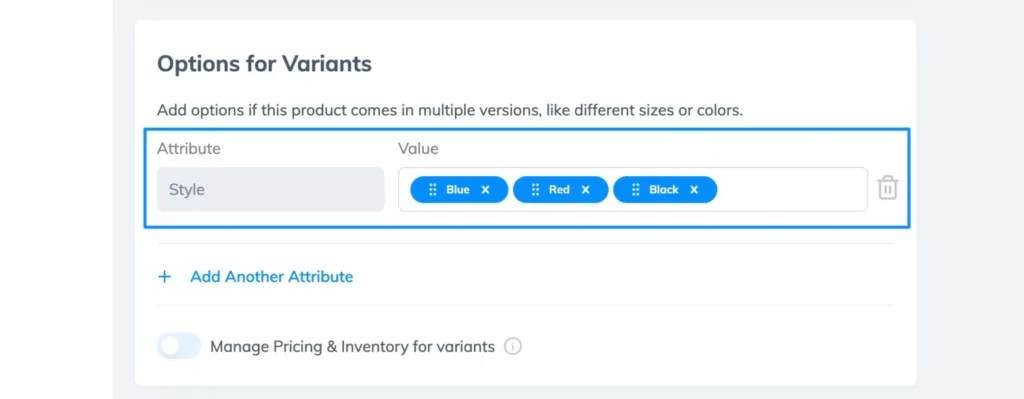
Variants get displayed as purchasing options on the frontend product page, so it’s important to type in Values as you want them to appear. For example, we’ll sell Blue, Red, and Black variants of the shirt in our example.
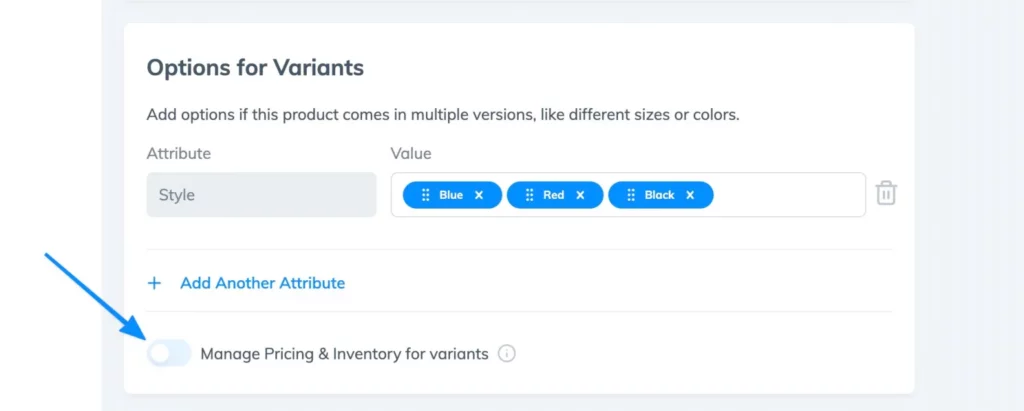
Sometimes variants have different prices. You’ll also want to add unique images to help customers decide which product variant to purchase. To make all of that happen, click on the switch to Manage Pricing & Inventory For Variants.
Click on the Edit button to change elements like pricing, weight, and dimensions for individual variants.
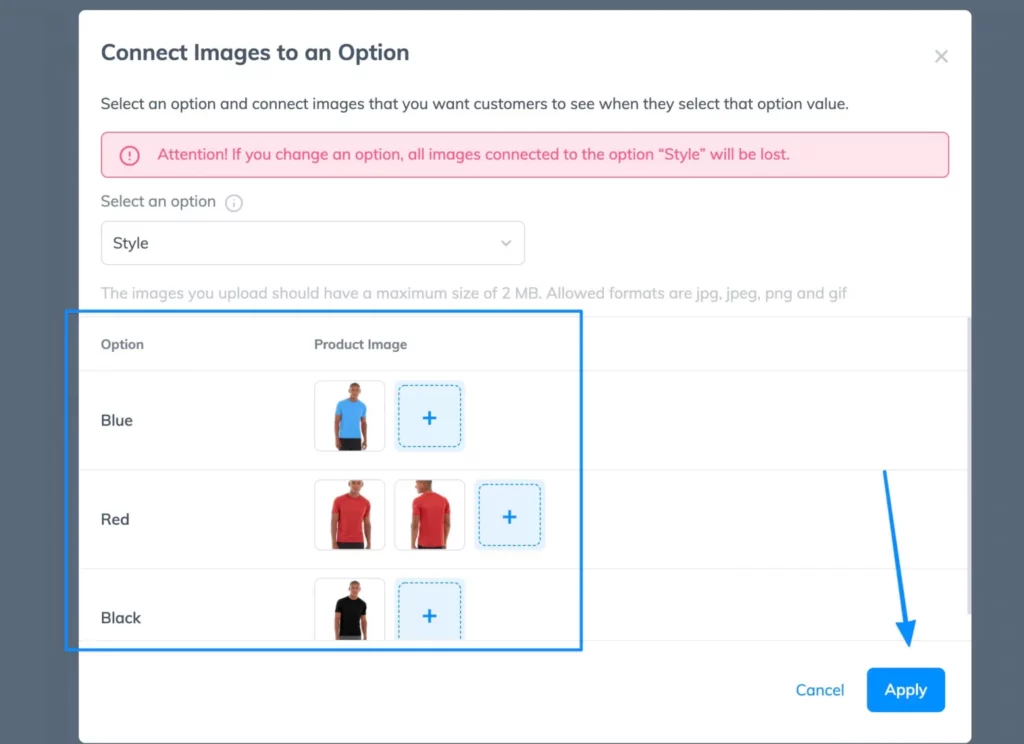
There’s also a Connect Images button.
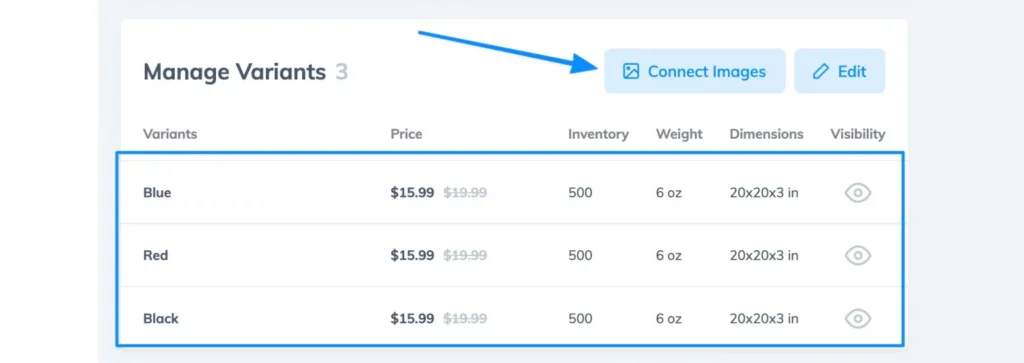
Upload images that associate with each variant. This way, when a user selects a variant, they’ll actually see the right color (or whichever variant you have). Click Apply when you’re done.
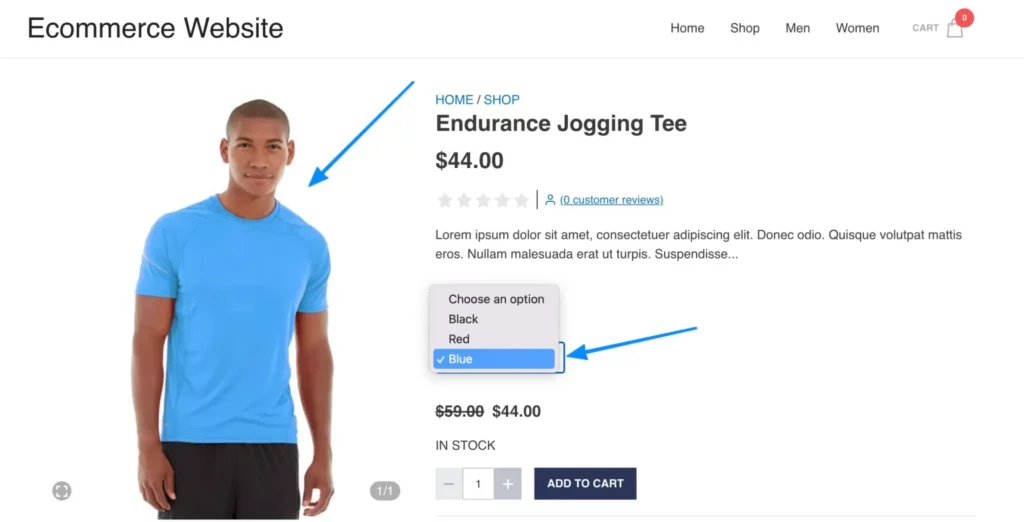
On the frontend, variants appear as drop-down selectors. The image instantly changes when we switch to another color.
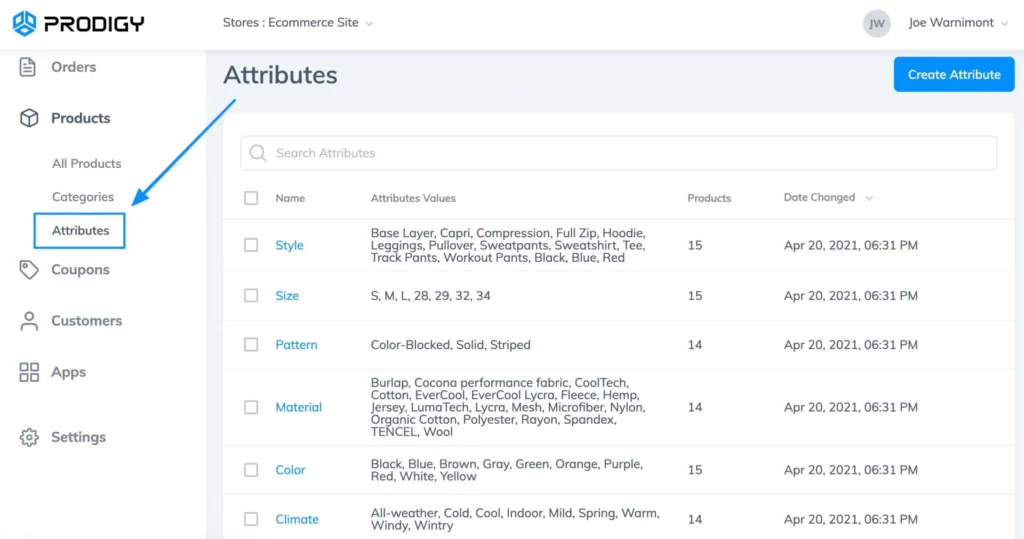
How to Add and Manage Attributes
You may find that the default attributes included with Prodigy don’t quite work for your store. If that’s the case, go to Products > Attributes in the dashboard.
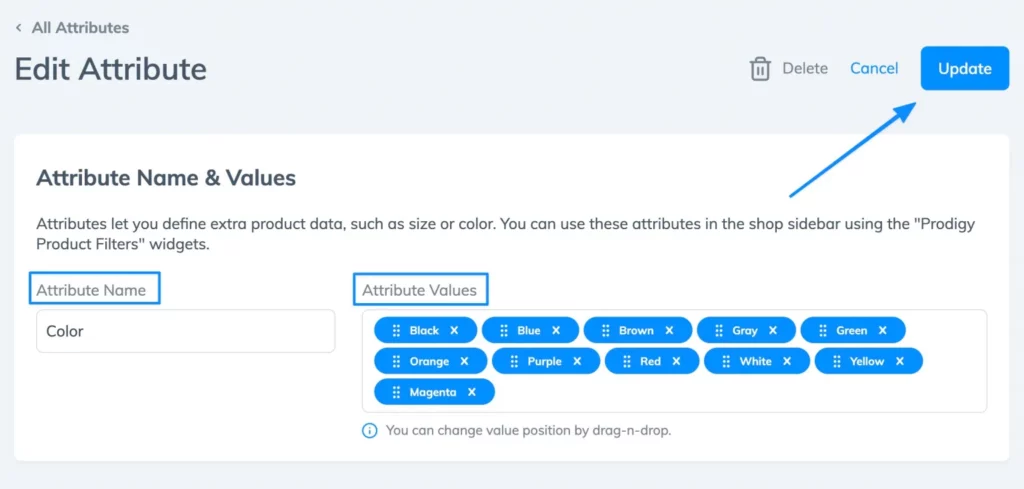
Here, you can click on the Create Attribute button to make a new one. Specify the Attribute Name and Attribute Value before adding or updating the attribute.
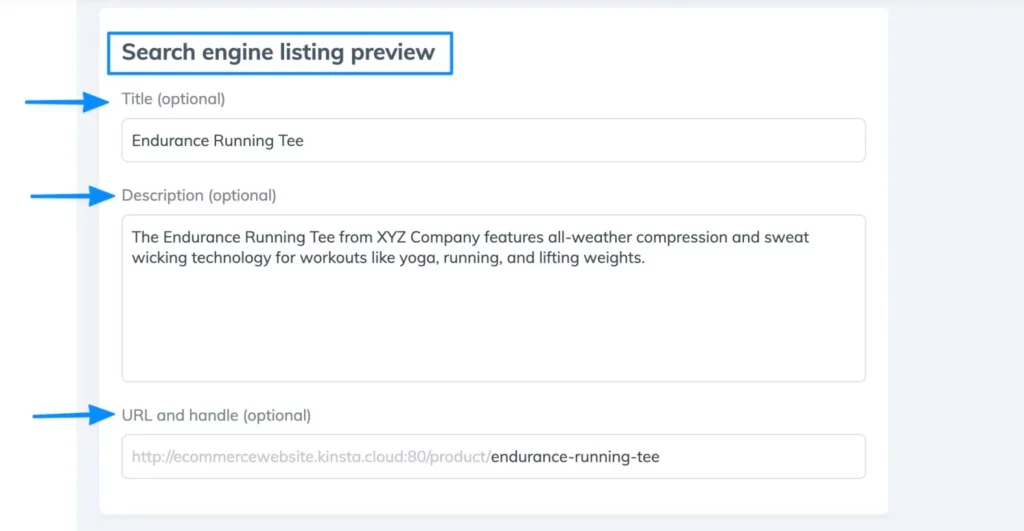
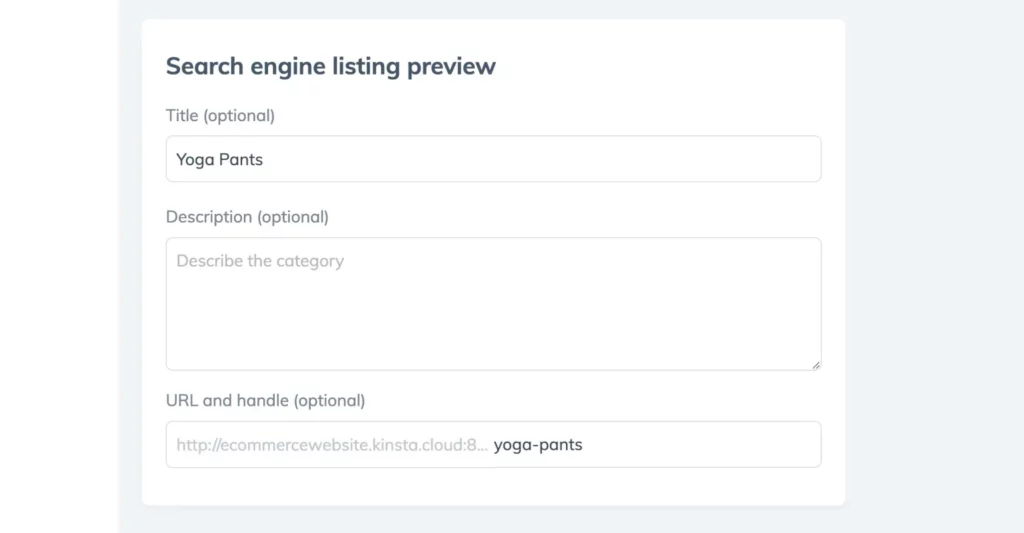
Set Search Engine Listing Elements
All product pages generate search engine listings by default, but in Prodigy, you also have the option to optimize the search engine listing title, description, and URL.
This is located towards the bottom of the product page editor, where you can fill in fields for each of them.
Adding Related Products for Up-selling and Cross-selling
The Related Products section contains two tools for potentially increasing customer cart values.
The first is called Up-sell. Here, you can search for other products in your store and add them to the current product you’re working on. Up-sells encourage customers to upgrade to a similar, but more expensive/valuable, product so you should try to find items that increase revenue/profitability but are still close in nature to the product in question.
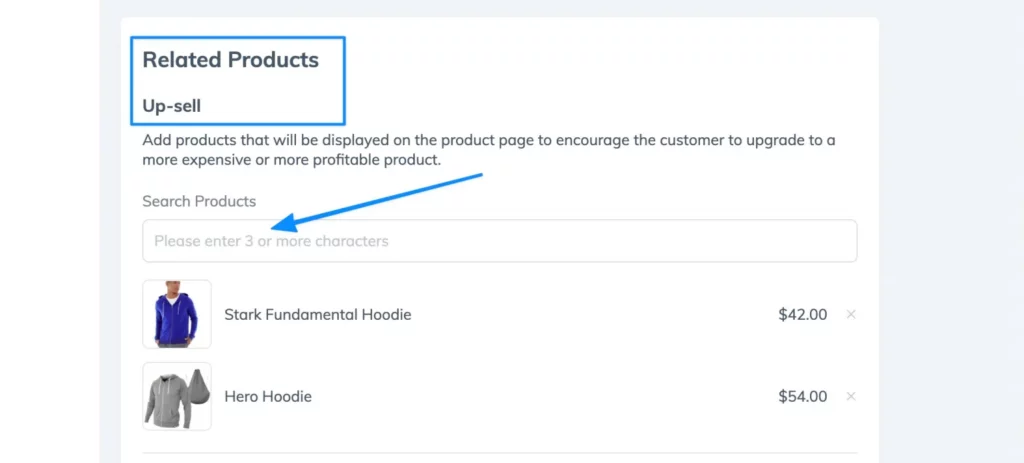
The up-sells get highlighted at the bottom of your product page.

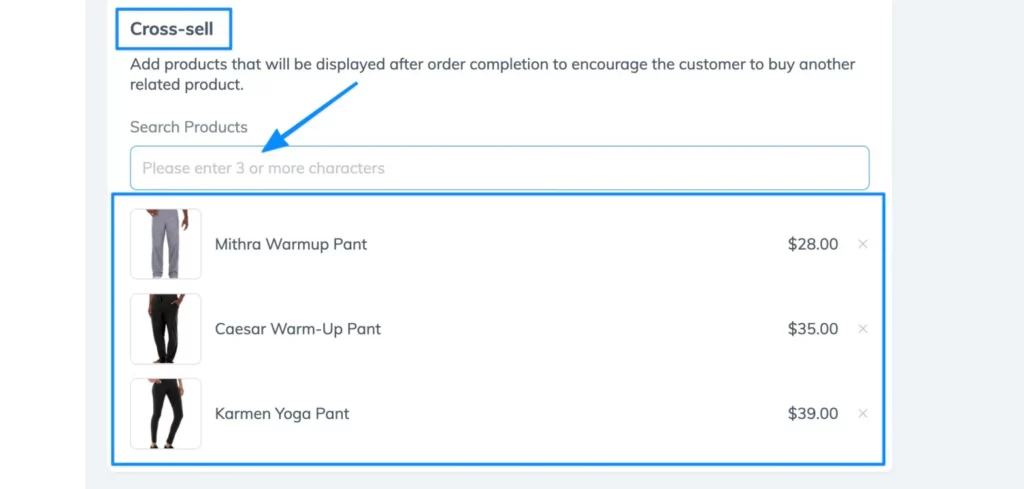
The Cross-sell field works the same way, where you type in characters to search for, find, and attach items to the product you’re editing. Cross-sells show up after a customer completes their order. The goal is to prompt them to buy another related item, so you may suggest something that goes well with the product they just bought.
Creating and Adding Product Categories and Tags
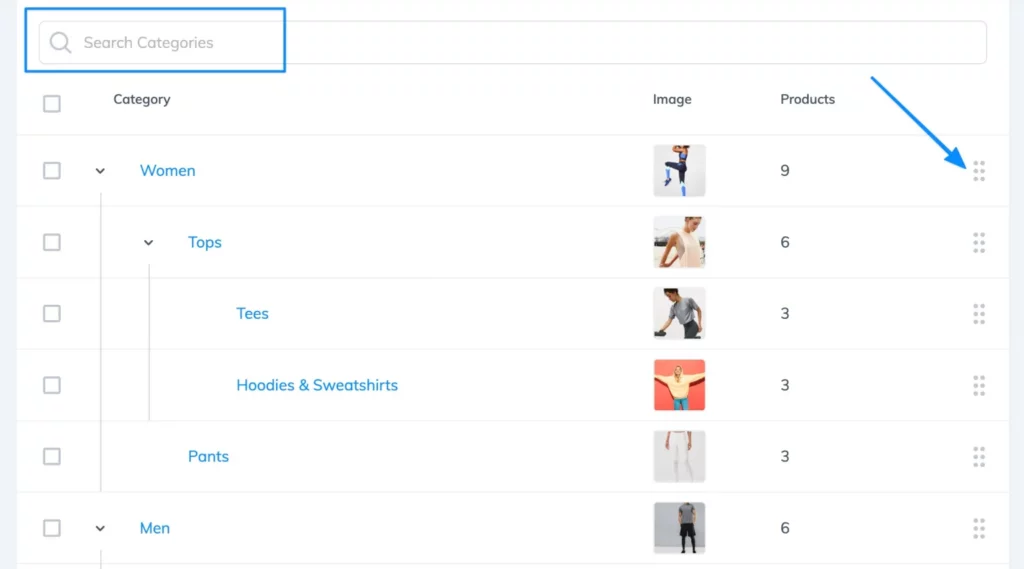
Product categories help store owners organize items for customers to find them easily. You can create category pages, list them in your main menu, and place sub-categories beneath parent categories. For instance, a clothing store might have categories for Men and Women, along with sub-categories for Tees, Sweaters, and Pants under each of those parent categories.
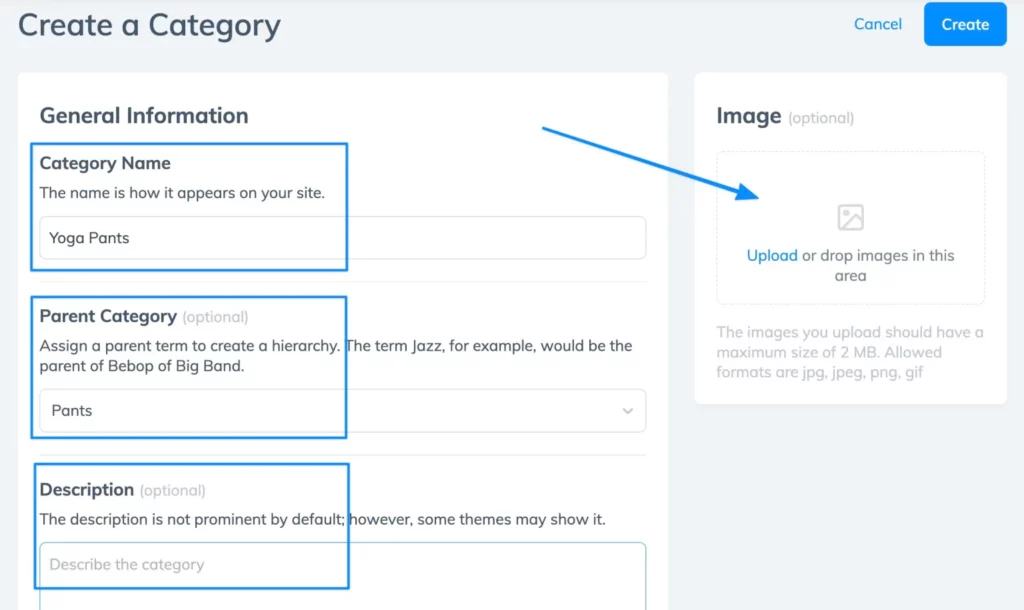
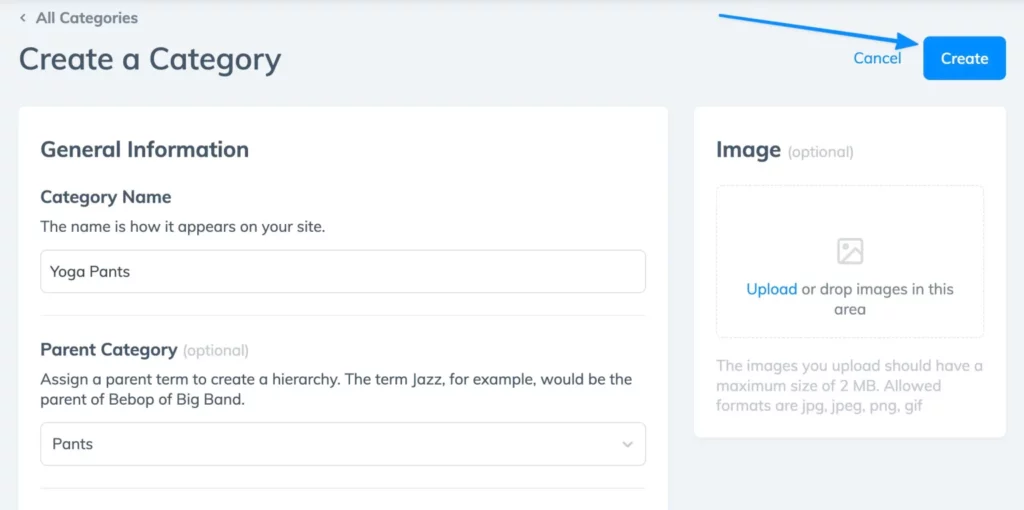
To begin, you must add new categories to your Prodigy store. To do so, go to Products > Categories, then click Create Category.

Fill in information like the Category Name, Parent Category (if needed), and its Description. Feel free to upload an image (it’s often possible to show these on Category pages in your theme).
There’s also an area to optimize category pages for search engines.
Click the Create button to add that category to your store.
The Category list in Prodigy offers options to search for a particular category and even drag categories to different locations in the hierarchy.
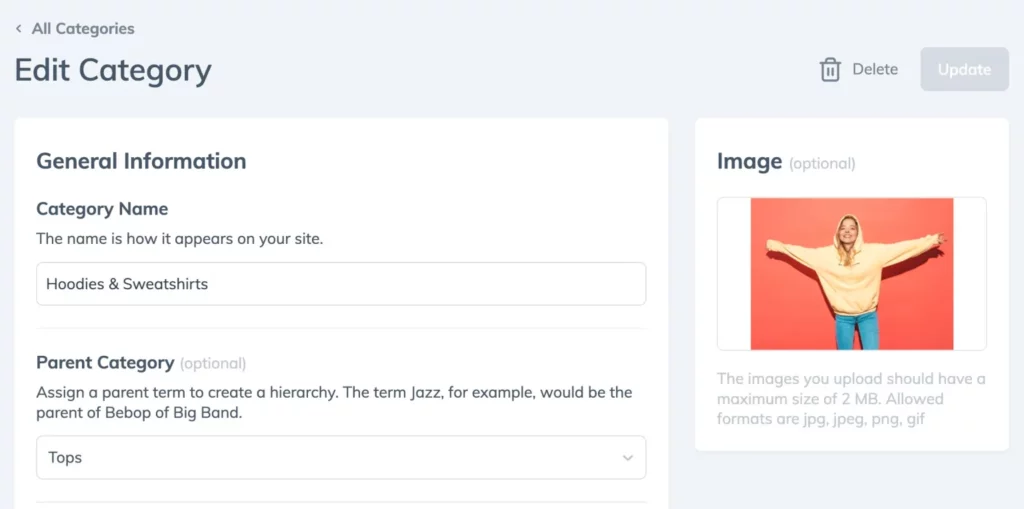
You can always click on a category from the list to edit what you inserted before.
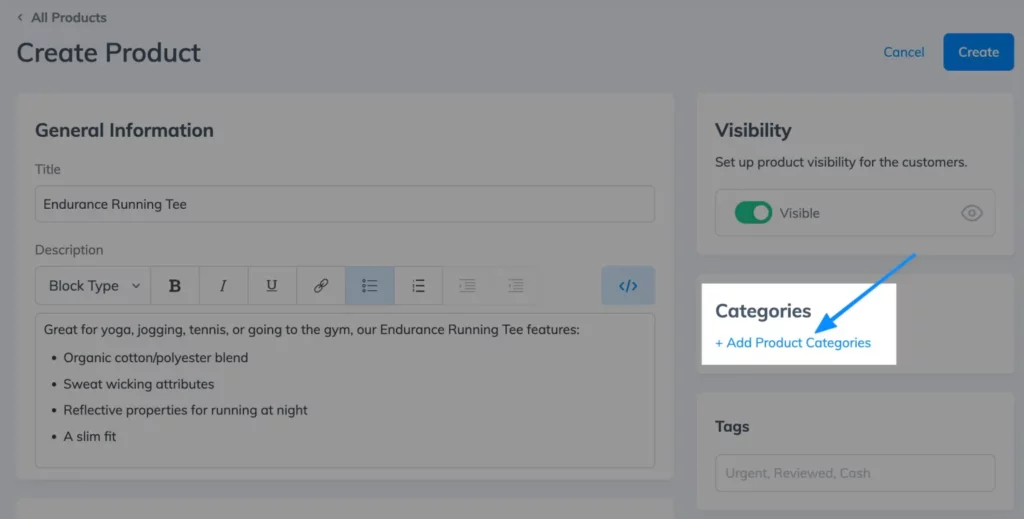
Once you have some categories saved to Prodigy, it’s possible to categorize a product.
Back in the Create Product page, click on Add Product Categories on the right side.
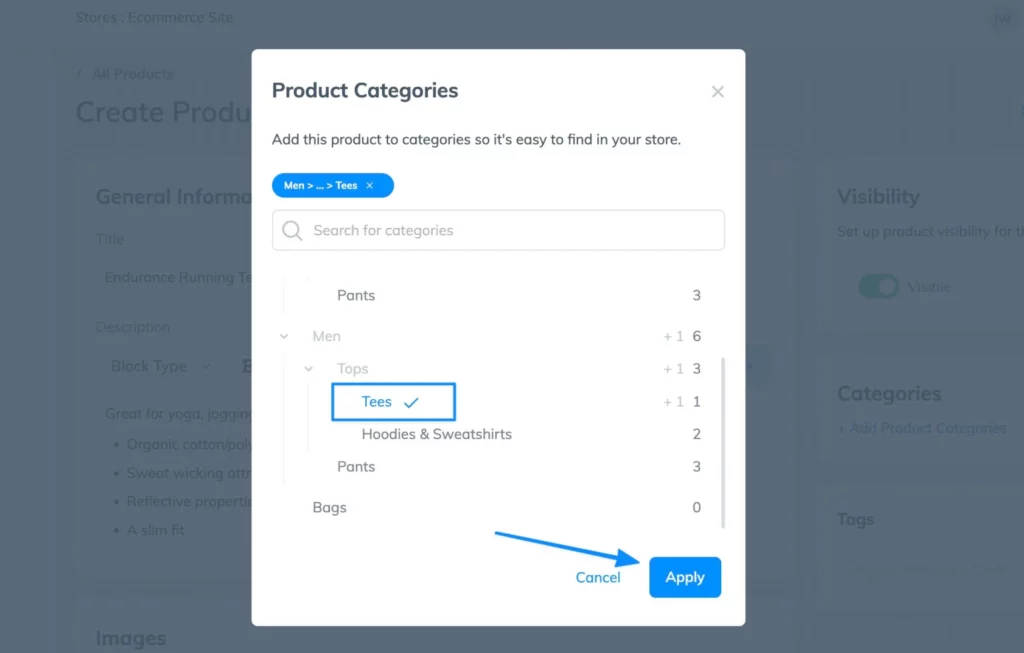
Search for a category or pick one from the list.
Click on the Apply button to save the product within that category.
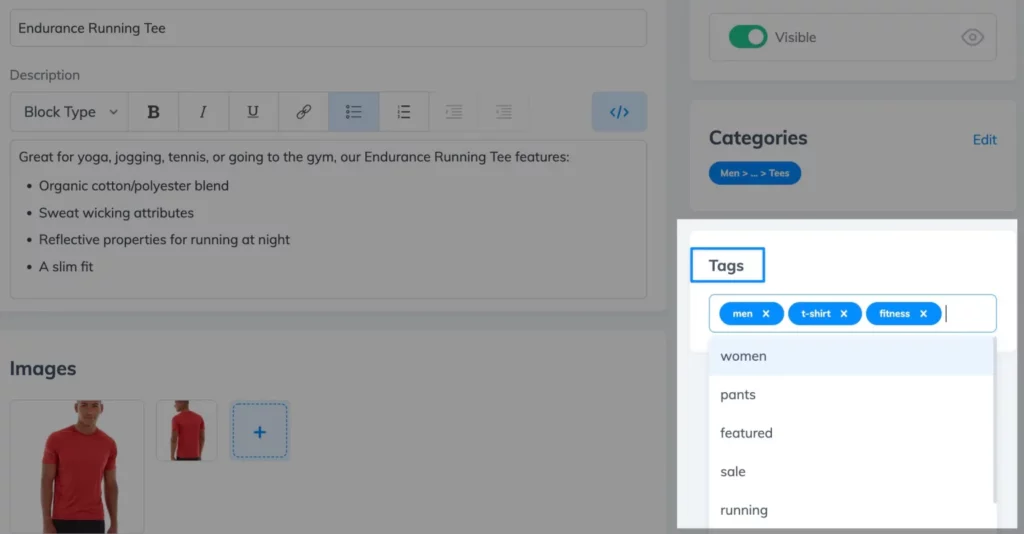
Many store owners also enjoy organizing their product collections with tags. These function as navigational links on your product pages for customers to view other products that may also correlate with the tag. Some categories may overlap with the tags, but tags are also excellent for more specific labeling like “fitness” or “summer styles.”
You can type in as many tags as you want and save them for each product.
Activating a Product and Making it Visible
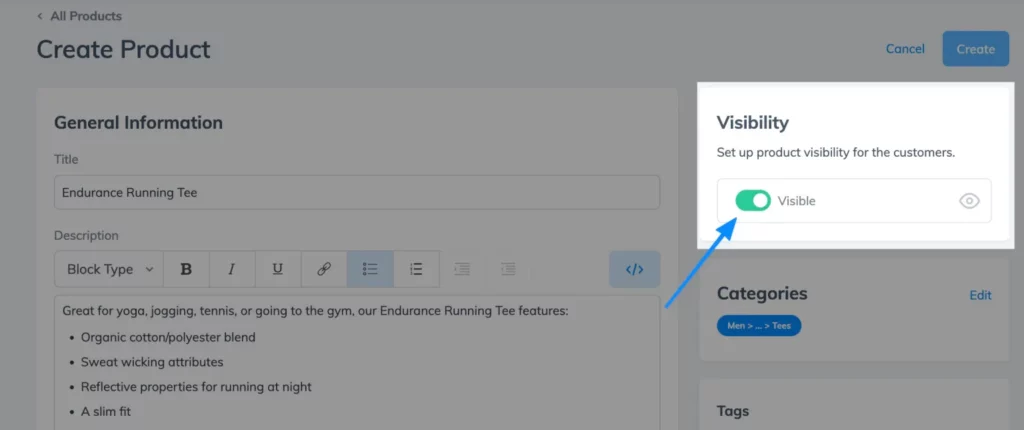
After completing everything from your product description to the category creation, it’s time to publish the product and make it visible in your store.
Flip the Visible switch so that this product shows up on your shop, along with other pages like category pages and the homepage.
To finish the process, click Create. That adds it to your list of products, syncs with your WordPress site, and allows customers to buy the item.
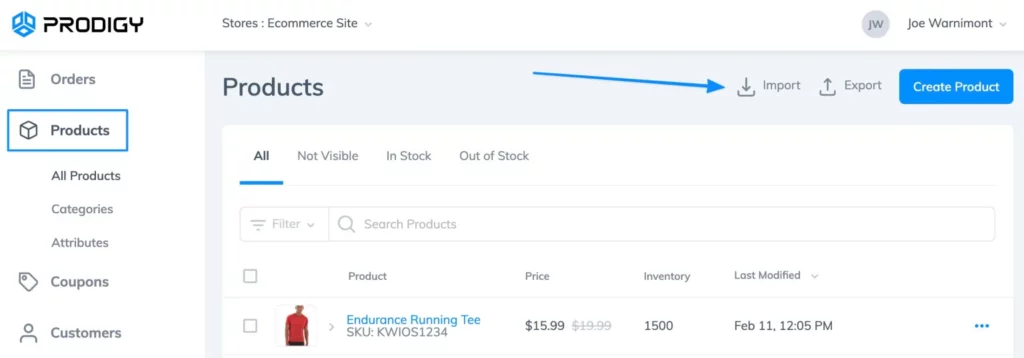
How to Import and Export Products
Some store owners already have a long CSV list of products to import. In that case, it’s far easier to use Prodigy’s one-click import tool as opposed to creating individual products.
To make that happen, go to the Products page in Prodigy, then click on Import.
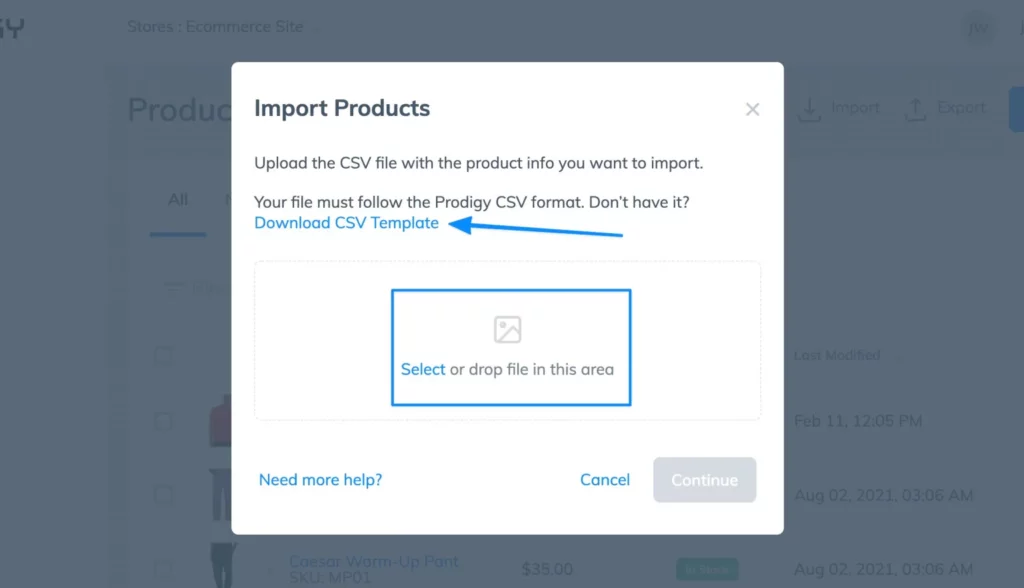
Upload a CSV file with your product list to the Import Product module. Prodigy requires a specific format when uploading a CSV, so you can click the Download CSVTemplate link to get the right format prior to importing.
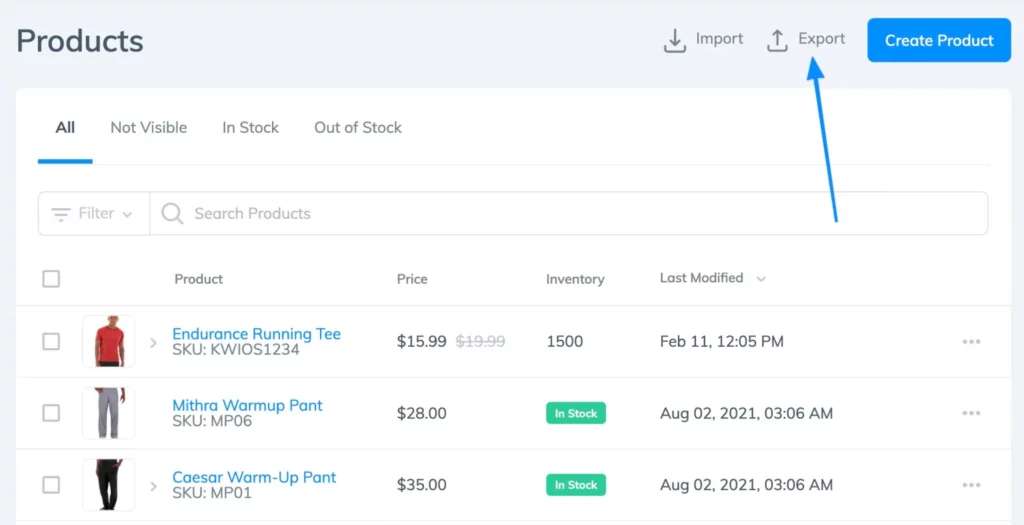
Prodigy also provides an Export feature to download your entire product collection and use it in other programs or print it out.
Also under the Products page, click the Export button to proceed.
Prodigy tells you how many products you’re about to export into a CSV file. Click Export.
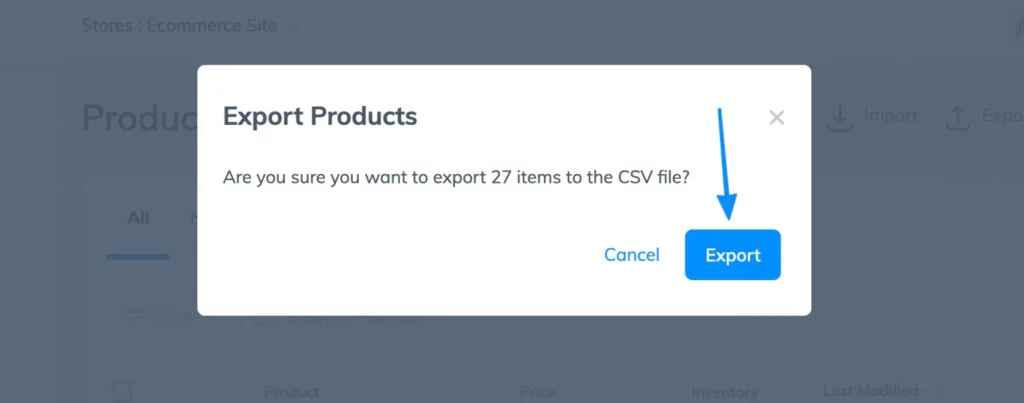
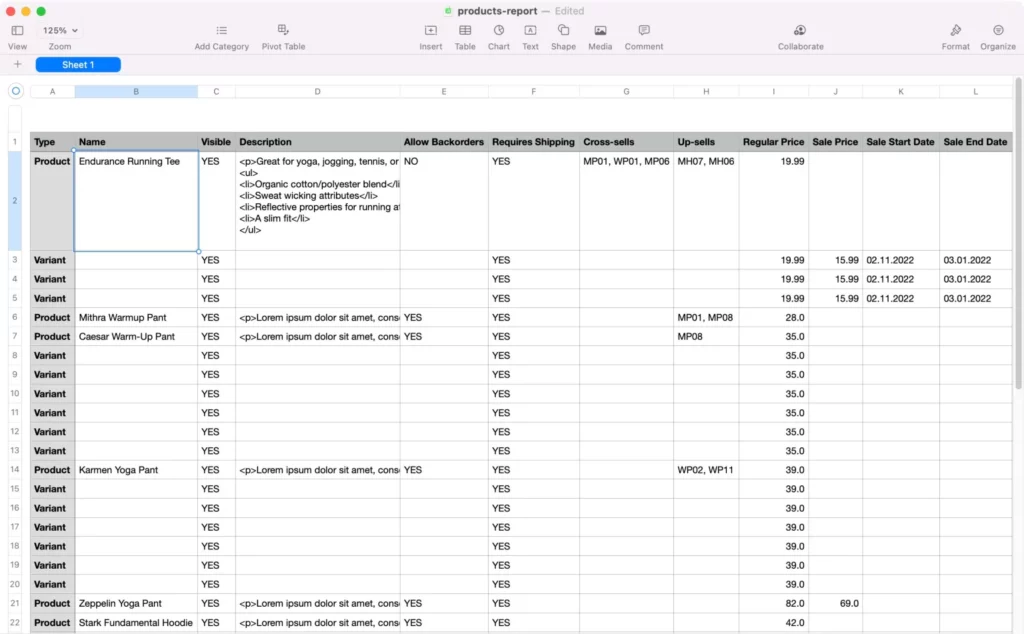
Now, you can view your entire list of products in a CSV file.
Organizing, Hiding, Filtering, Searching, and Deleting Products
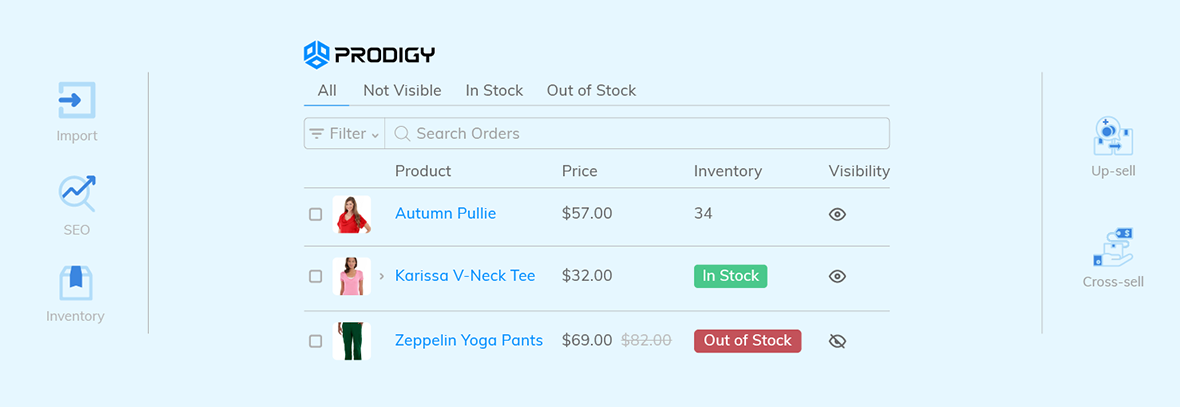
The Products page in Prodigy lists every item you have in inventory. Seeing as how your product list could get extremely long, Prodigy provides a wide range of features to hide, delete, organize, filter, and search for products.
First, you can click the “…” (ellipsis) link on any product to either hide the item or delete it from your inventory.
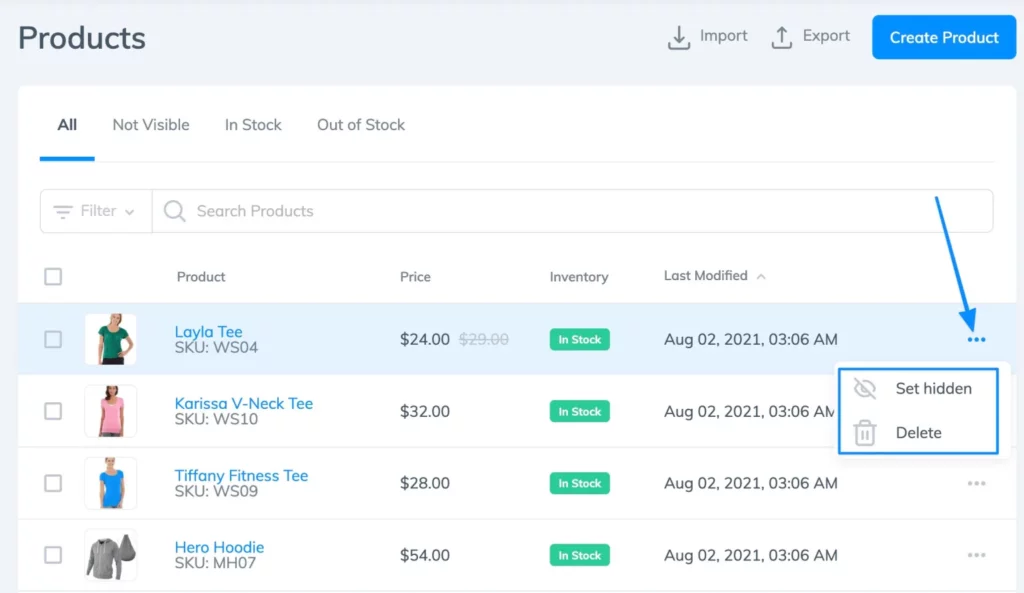
When hidden, the product remains on the list but contains a special icon of a crossed-out eye.
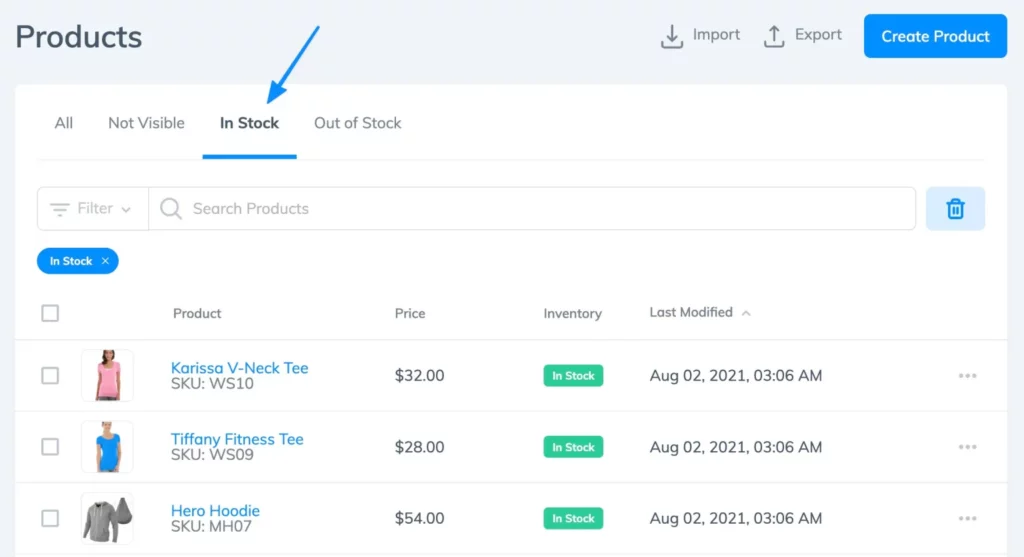
For filtering, your product list has four instant filter tools to reveal:
- All products
- Not Visible products
- In Stock products
- Out of Stock products
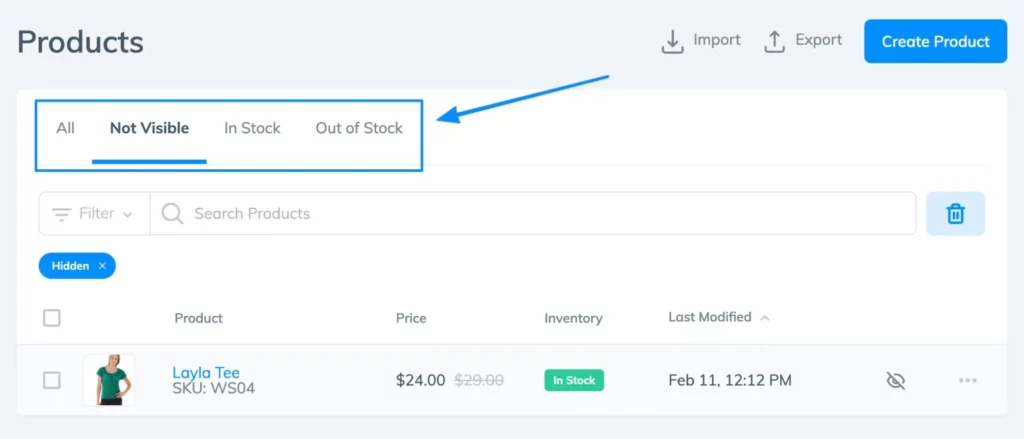
For instance, selecting In Stock only shows those products marked with the green In Stock inventory label.
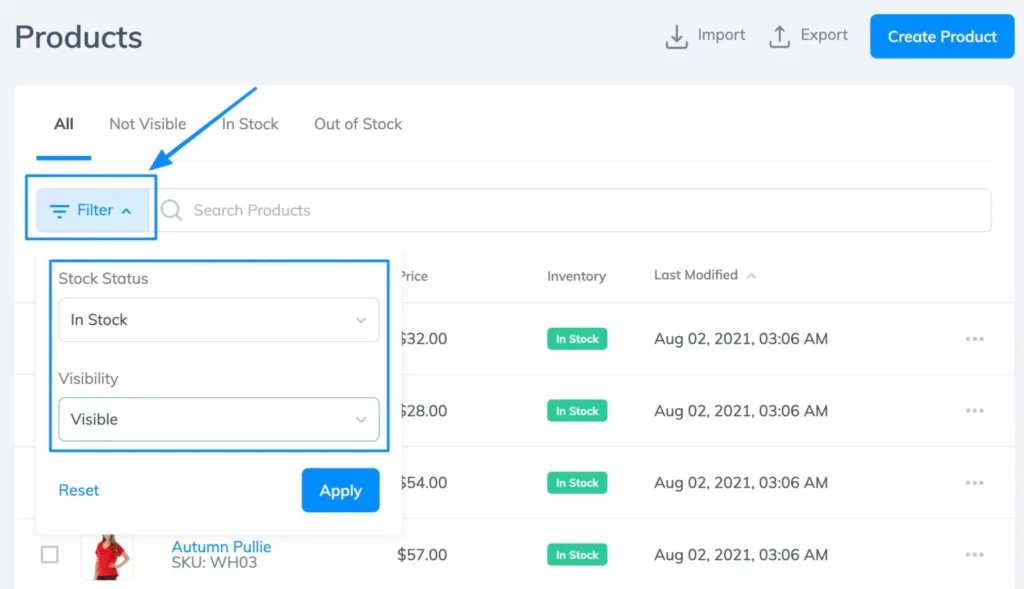
The Filter drop-down has similar functionality, but it lets you combine filters for more advanced results (like showing In Stock items that are also Visible).
In addition, Prodigy has a search bar for you to type in any keyword and see which products have those words within their titles or descriptions.

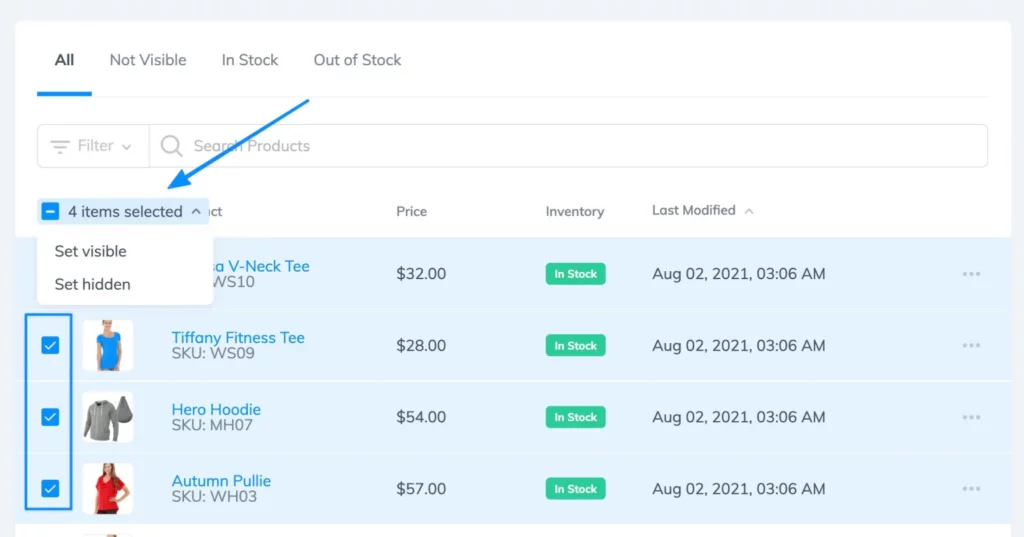
Finally, you can bulk edit products by checking multiple items and either setting all of them as visible or hidden.
Try Prodigy Commerce for a Streamlined Product Management Experience
Product management is only the start to how Prodigy Commerce shines when compared to other WordPress eCommerce solutions like WooCommerce. Read about the entire Prodigy Commerce platform, and contact the Prodigy support team if you have questions. Sign up for a free Prodigy account to launch a better online store today.